Saturday, February 29, 2020

There's Nobunny Like You


Good morning and thanks for stopping by! Today I am up on The Rabbit Hole Designs blog with a new card featuring the recently released All Ears stamp set. How cute are those bunnies all stacked up? There are so many different ways to color them and they always look so cute! During the hop the design team colored them in pastels, grays, browns, and just fluffy white. For my card today I decided to leave them mostly white with a light grey border around the edges just to accentuate the white.  I of course colored their ears pink and gave them pink cheeks with polka dots.  One of my favorite things to do with critter stamps is to give them pink cheeks with 3 white dots in a triangle with my white gel pen.  I just think it adds a lot of charm to them.

I decided to use a kraft color card base and start with a 4x4 square card.
This was a super easy card to make once the coloring was done.  I used some pretty Spring themed Doodlebug design paper and cut it down using The Kat Scrappiness Zig Zag Border die.  I created a half circle for the bunnies to sit on. For the base of the card I created some texture on the base of the card using a polka dot embossing folder. The bunnies were popped up on foam tape and the sentiment from the same stamp set was stamped onto white paper, trimmed and matted with kraft paper.

Although it's a simple card design I just love how all the colors go together so well!

So glad you could join me today!

For more inspiration, updates, and news make sure to check out these places ...


Have a great day, I already am!
🐰 Lisa  🐰 


Wednesday, February 26, 2020

The Rabbit Hole March Inspiration Hop Day 3


Good morning and welcome to Day 3 of The Rabbit Hole Designs March Inspiration Hop!
I hope you enjoyed seeing all the inspiration yesterday from the design team using the 
OWL-right stamp set. For our 3rd and final day of inspiration we have another 4x4 stamp set that will make you say AWWWWW! Just in time for Easter comes a whole furry bunch of rabbits!
Introducing All Ears!


Hopefully you enjoyed the little bit of owl trivia I shared with you yesterday because today I am back with some rabbit trivia:

A group of rabbits is known as a colony or nest (or, occasionally a warren, though this more commonly refers to where the rabbits live). A group of baby rabbits produced from a single mating is referred to as a litter, and a group of domestic rabbits living together is sometimes called a herd.

And this concludes the rabbit trivia portion of today's blog post!
πŸ˜‚ 🐰 πŸ˜‚ 🐰 πŸ˜‚ 

For today's card I decided to do a bit of watercoloring so I could achieve a light pastel palette for my Easter bunnies.  I broke out my Zig Clean Color Markers and picked the lightest colors.  I just love how they came out, they are like a bright pastel rainbow of bunnies!

For the rest of my bunny card I wanted to create a shaker card. I started out by doing some ink blending over the Diamond Flower stencil with pastel colored Distress Inks to match the colors of the bunnies. I adhered the stenciled panel on top of my card base. 

I took some glitter paper and I made a frame out of the largest Stitched Scalloped Rectangle die from Kat Scrappiness by using the second smallest die from the Embossed Edge Rectangle dies to cut out the middle of the scalloped panel. I adhered an A2 Acetate sheet from Kat Scrappiness to the back of the frame and then I built it up with foam tape.

I sprinkled some pastel sequins from The Rabbit Hole and some clear seed beads onto the face of the card and then carefully laid my frame over top of them.  I glued the bunnies down to the top of the acetate panel and stamped the sentiment onto some patterned paper to adhere under the bunnies.


I hope you enjoyed seeing my card today and for more inspiration from the rest of the design team make sure to hop around to all of their blogs:


GIVEAWAYS: To celebrate all the days of the release, The Rabbit Hole Designs is giving away two gift certificates; one to a lucky Instagram Follower and one to a lucky Facebook Fan Page follower. Winner will be chosen at random from the comments left on the INSTAGRAM post, and tagging friends, and also from commenting on the Fan Page post. 

So make sure to head on over to INSTAGRAM and look for the giveaway post @therabbitholedesignsllc and look for the post at The Rabbit Hole Designs Fan Page by 11:59 p.m. PST 02-27-2020. Winner will be announced on The Rabbit Hole Designs blog 02-28-2020.

For more inspiration, updates, and news make sure to check out these places ...


Have a great day, I already am!
🐰 Lisa  🐰 

Peacock Backdrop Thank You Card


Hello and welcome to my blog! Today I am up on the Kat Scrappiness blog with a card using some old and new products from the KS store! I made a thank you card because you can never have too many of those! One of my favorite techniques is ink blending and especially in rainbow colors! I just love to make an ink blended rainbow and then cut a pattern out of it.  Here's the short and sweet on how I made my card.

I started with a base of Bristol Smooth cardstock and did some ink blending with some Distress inks in rainbow colors.  I die cut the rainbow panel using the Peacock Backdrop Die. I love how the peacock pattern showed up really well through the rainbow colors!

I cut the rainbow panel down to a smaller rectangle size so I could layer it on to another piece of cardstock.  I embossed another panel with some larger polka dots and adhered the rainbow panel to that.

The last step was to die cut the Thank You Brush Script Word Die out of white paper and lay that on top of the rainbow panel. I decorated the entire card with Pink Heart Droplets, Blue Heart Droplets
and White Jewels for some extra sparkle!

Here's another pic with all of the supplies pictured:


I love how this card came out and I love the pattern in the Peacock Backdrop Die! I hope this gave you some new ideas about using your cover dies!

That's all for today, don't forget to follow Kat Scrappiness on all
social media platforms to be alerted to new release, sales and giveaways!


Thanks for joining me today!
Have a great day, I already am!
🦚  Lisa  🦚 

**Affiliate links are used occasionally
at no additional cost to you. These
are products that I may have been sent
or ones that I purchased on my own.
Either way, they are products that I 
use frequently and LOVE!

Tuesday, February 25, 2020

The Rabbit Hole March Inspiration Hop Day 2


Good morning and welcome to Day 2 of The Rabbit Hole Designs March Inspiration Hop!
I hope you enjoyed seeing all the inspiration yesterday from the design team using the Beautiful Disaster stamp set! Today we have another 4x4 stamp set to make you chuckle!
Today's stamp set is called OWL-right and it features a whole group of silly owls!


How about a little Owl trivia for you? I was wondering about the name for a group of owls so I googled it and here's what I came up with:

Owls are generally solitary, but when seen together, the group is called a "parliament" as they have long been considered to be of a wise disposition. In Greek mythology, the owl is the symbol for Athena, the goddess of wisdom. 

Ok that was your daily dose of trivia and you're welcome!
πŸ˜‚ πŸ¦‰ πŸ˜‚ πŸ¦‰πŸ˜‚  

For my card I colored up that crazy parliament of birds with my Copic markers and gave them some funky colored wings for some fun! The background panel they are on is embossed with a wood grain embossing folder to mimic a tree trunk background. I found some cute patterned paper from one of my Doodlebug paper packs and layered it under my embossed panel.  To finish the card off I tied some twine around the top of the card and hung the sentiment from it after punching a hole in the sentiment strip.

I hope you enjoyed seeing my card today and for more inspiration from the rest of the design team make sure to hop around to all of their blogs:


GIVEAWAYS: To celebrate the next 2 days of release, The Rabbit Hole Designs is giving away two gift certificates; one to a lucky Instagram Follower and one to a lucky Facebook Fan Page follower. Winner will be chosen at random from the comments left on the INSTAGRAM post, and tagging friends, and also from commenting on the Fan Page post. 

So make sure to head on over to INSTAGRAM and look for the giveaway post @therabbitholedesignsllc and look for the post at The Rabbit Hole Designs Fan Page by 11:59 p.m. PST 02-27-2020. Winner will be announced on The Rabbit Hole Designs blog 02-28-2020.

For more inspiration, updates, and news make sure to check out these places ...


Have a great day, I already am!
πŸ¦‰Lisa πŸ¦‰

Monday, February 24, 2020

The Rabbit Hole March Inspiration Hop Day 1


Good morning and welcome to Day 1 of The Rabbit Hole Designs March Inspiration Hop!
For this release we have a Beautiful Disaster to share with you and I think you are going to fall in love with her! The brand new stamp set from The Rabbit Hole Designs is called Beautiful Disaster and here is a look at the 4x4 stamp set:


I absolutely fell in love with this stamp set and couldn't wait to create with it.  I used my Copic markers to color this beauty and I was quite happy with how she turned out.  I actually attempted a masking technique and I love the results.

I started by stamping the image on to some masking paper and cutting it out by hand. I then stamped the image onto a panel I cut using the largest Distressed Edge Rectangle Die from Kat Scrappiness and place the mask around the image. Next I took some Peacock Feathers Distress Oxide Ink and did some ink blending just around the image itself. When I peeled off my mask it was like magic.  I had the perfect ink blended "aura" around my stamped image.

I proceeded to color the image with my Copic markers making sure to pay close attention to the creases in her sweater and the highlights in her hair.

I used some pretty floral patterned paper that I got recently from Stampin Up and adhered it to my card base. I layered the stamped image panel on top of the patterned paper.

To finish off the card I added a few Teal Jewels from Kat Scrappiness for some extra color.

I hope you enjoyed seeing my card today and for more inspiration from the rest of the design team make sure to hop around to all of their blogs:


GIVEAWAYS: To celebrate the next 3 days of release, The Rabbit Hole Designs is giving away two gift certificates; one to a lucky Instagram Follower and one to a lucky Facebook Fan Page follower. Winner will be chosen at random from the comments left on the INSTAGRAM post, and tagging friends, and also from commenting on the Fan Page post. 

So make sure to head on over to INSTAGRAM and look for the giveaway post @therabbitholedesignsllc and look for the post at The Rabbit Hole Designs Fan Page by 11:59 p.m. PST 02-27-2020. Winner will be announced on The Rabbit Hole Designs blog 02-28-2020.

For more inspiration, updates, and news make sure to check out these places ...


Have a great day, I already am!
☕️Lisa πŸ‘©πŸΌ

Butterfly Thank You Card


Good morning everyone! Today I have a card for you featuring 2 different i-Crafter sets from the February release.  The first one is the Love Bug dies:


And the second one is the Pop Up Wiper Insert dies:


For the base of my card I took a piece of heavy white cardstock and cut it to 5 1/2 x 4 1/4" and then I scored it using the Scor-Pal tool horizontally every 1/2" to give the look of an embossed panel wall.  Once the scoring was done I ran the outside edge of that same panel along the Ranger Watermark Resist ink pad and then sprinkled with Hero Arts Silver embossing powder and heated it until it was smooth and melted. I adhered this panel directly to my top folding card base that was the same size.

Next I did some additional heat embossing with Hero Arts Silver embossing powder along the bottom half of a white panel of cardstock. After I heated the powder I lined up the "thanks" die from the Pop Up Wiper Insert dies half on and half off the embossing and ran it through my die cut machine.  The result was a word die that was only embossed with silver powder along the bottom half of the word.

For my sweet butterfly I used one of the dies from the Love Bugs die set and cut out all of the pieces from Tonic glitter paper in Opulant Orchid and Sugar Crystal for some extra sparkle.  I used foam tape to pop up the butterfly and made sure to press the wings upward to give some dimension. I affixed the butterfly just above the T in Thanks and my card was complete.

Thank you for stopping by today and now you can shop i-Crafter at
Simon Says Stamp as well as the i-Crafter online shop!
For more inspiration, updates and news you can check out the i-Crafter

Have a great day, I already am!
πŸ¦‹Lisa πŸ¦‹


** Affiliate links are used occasionally 
at no additional cost to you. 
These are products that I may have been 
sent or ones I purchased on my own. 
Either way, they are products that I use 
frequently and LOVE!

Friday, February 21, 2020

Bear-ly Conscious


Welcome back to my blog! Today I am up on The Rabbit Hole Designs blog with another card using the recently released Caffeinated Bear


One of my favorite things to do with the caffeinated critters is to customize their bathrobes with paper piecing. I just love how the bathrobe came out on this bear in all its floral print glory. And come on, who can resist those adorable bunny slippers! 


I decided to put miss BEAR-LY conscious on a large coffee cup.  
I used the Coffee Mug Card Die Set from Trinity Stamps because I love how big it is! It could be a card all by itself and I love that it comes with a gift card holder insert. I cut it apart and used half the die so I could create a scene on it.  I used the Cloud Stencil from My Favorite Things and some Tumbled Glass Distress Oxide Ink to make some light puffy clouds in the background. Next I created some pretty green grass using the Grassy Border die from Lawn Fawn. I inked the tips of the grassy border with Cracked Pistachio Distress Oxide Ink for a little bit of contrast. 
I stamped the sentiment from the Caffeinated Bear stamp set in brown ink on an angle to give the card a little bit of extra interest, and then I added some brown sequins for fun.
I adhered my coffee cup to a kraft base panel that I ran through my Darice Cloud Embossing folder.

I love how this card came out and I really enjoyed creating a mini scene on the coffee cup die!


For more inspiration, updates, and news make sure to check out these places ...


Have a great day, I already am!
🐻Lisa 🐻

Tuesday, February 18, 2020

Monster Hug in a Mug!


Good morning and welcome to my ICU!
I am up again today on The Coffee Loving Cardmaker's Blog and I've got a couple of coffee mugs filled with really cute monsters just for you!


These adorable monsters are from the Monster Love stamp set by Trinity Stamps.  The coffee mugs are from the Hot Cocoa Cup Dies by My Favorite Things. I decorated them using the Trinity Coffee Bean Background Stencil.  I just love that stencil because it comes with 2 different stencils and you can give each bean 2 different colors.  It's so much fun! The sentiment is from a Gerda Steiner stamp set called Coffee Monsters.  For the frame around the sentiment I cut out a small
Zig Zag Rectangle Die from Kat Scrappiness.
I just think those monsters are super cute popping out of those mugs!


I colored them with my Zig markers and cut a slit in my coffee mugs so they could sit inside them.  I also gave them lots of white polka dots for some extra fun!  I hope you enjoyed this fun card today.  It certainly put a smile on my face when I was making it!

Have a great day, I already am!
☕️Lisa ☕️

** Affiliate links are used occasionally 
at no additional cost to you. These
are products that I may have been sent
or ones that I purchased on my own. 
Either way, they are products that I use
frequently and LOVE!

Sunday, February 16, 2020

Paper Sweeties February 2020 Look Back Inspiration - Day #3


Welcome back to day 3 of the inspiration blog hop for Paper Sweeties!
I hope you had a chance to see all of the sweet projects from the DT yesterday!
Today I have another card for you using the Love you to pieces stamp set.


This set has the most beautiful sentiments in a mixed font style.  They can be very cute or dressed up to look very elegant! I did some simple ink blending over a circle pattern stencil and I let the sentiment take center stage.  I stamped it in watermark resist ink and heat embossed it with white embossing powder.  I have always loved the look of rainbow colors against a black background.
I really love how this card turned out and I hope you do too!

I hope you'll take a look at some of the older Paper Sweeties stamp sets and dies in a new way. Hop along with the rest of the design team so they can share some more inspiration using these sets and some other favorites!


Have a great day everyone, I already am!

🌈Lisa 🌈 

Saturday, February 15, 2020

Paper Sweeties February 2020 Look Back Inspiration - Day #2


Welcome back to day 2 of the inspiration blog hop for Paper Sweeties!
I hope you had a chance to see all of the sweet projects from the DT yesterday!
Today I have another card for you using the Sent from my heart stamp set.


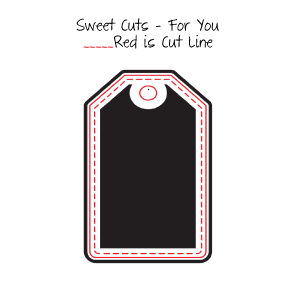
I just love that little doggie holding the letters! I thought it would be fun to do some masking and stamp a bunch of the letter image on the bottom of a tag and have the doggie standing on it. I cut out a tag in pink paper using the For You Sweet Cuts tag die and I did some ink blending with a darker pink on the bottom of the tag.


After the ink blending I stamped the cluster of envelopes on to some masking paper so that I could stamp a bunch of them and it would look like a pile of envelopes. I added the sentiment "Sending You Hugs and Kisses" from the Sent from my heart stamp set to the top of the tag. I colored that cute doggie in Dalmation style, cut him out and popped him up on the tag.
I did some dry embossing with a heart folder to the front of the card to add to the "LOVE " theme.
All that was left to do was to add some scrumptious Strawberry Seam Binding and some pretty
Cotton Candy Sequins and my card was done.

I hope you enjoyed my card today and you'll take a look at some of the older stamp sets and dies in a new way. Hop along with the rest of the design team so they can share some more inspiration using these sets and some other favorites!


Have a great day everyone, I already am!

🐢Lisa πŸΆ

Friday, February 14, 2020

Paper Sweeties February 2020 Look Back Inspiration - Day #1!


Welcome back to another monthly inspiration blog hop from Paper Sweeties
Instead of a new release this month we are looking back at some older sets released 
by Paper Sweeties and giving them new life.
For today's card I used these 3 stamps and dies:

A friend is Sweet Cuts

A friend is

Love you to pieces


For my card I started with a panel of Bristol Smooth card stock and did some ink blending with Spun Sugar, Picked Raspberry and Wilted Violet Distress Oxide inks. Next I took the heart stamps from Love you to pieces and A friend is and I stamped them all over the ink blended panel in sticky embossing ink. I sprinkled the panel with white embossing powder and then heated until they were smooth and melted. The sentiments from Love you to pieces  are some of my favorite because I just love that happy mix of fonts! I stamped the scalloped oval frame from A friend is and then put one of the sentiments inside of it and I stamped the flowers from the same set on to patterned paper and cut out 3 of them to pop up on the corner of the frame. To finish off my card I added some sparkly twine to the top of the card. I hope you enjoyed my card today and you'll take a look at some of the older stamp sets and dies in a new way. Hop along with the rest of the design team so they can share some more inspiration using these sets and some other favorites!
Maria Patrick

Have a great day everyone, I already am!
🌺Lisa 🌸

Tuesday, February 11, 2020

DIY Stencils with the Kat Scrappiness Heart Panel Die and a Video


Since I got the Heart Panel Die from Kat Scrappiness, I've been thinking that it would make an awesome stencil.  After some internet browsing I found out that you can buy full size acetate sheets just to make your own stencils! GENIUS!! I found this listing on Amazon for 12x12 stencil sheets:


I only paid 7.99 for this item but at the time I am writing this post the price is listed as $9.69. 
Still a good price since it comes out to $1.23 per sheet and you can get 4 stencils from 1 sheet by cutting each sheet into four 6x6 individual sheets. 
That's roughly 30 cents a stencil! You can't beat it. Now you can make your dies do double duty.  It's like getting 2 products in one! These sheets cut very easy in my die cut machine and I can't wait to cut some more!

Here is the card I made after I used my homemade stencil with the Heart Panel Die.


I used the Happy Valentine's Day sentiment from the Kat Scrappiness Say It With Hearts stamp set and I stamped it on to one of the dies from the Stitched Sentiment Strips.
What a fun technique and it's amazing how many possibilities there are just with the cover dies alone from Kat Scrappiness! Check out the patterns in these cover dies, 
I bet they would make gorgeous stencils!


I have a video showing the process of making the stencil and the card.
You can watch it here or on YouTube.


I hope you enjoyed learning about DIY stencils and that you'll give it a try as well!

Have a great day, I already am!
πŸ’“Lisa πŸ’“

**Affiliate links are used occasionally
at no additional cost to you. These
are products that I may have been sent
or ones that I purchased on my own.
Either way, they are products that I 
use frequently and LOVE!

Rainbow Cards with Heart Panel Die and Video


I'm up on the Kat Scrappiness blog today with a couple of pretty rainbow cards using these 3 
Kat Scrappiness products:


I started with a piece of Bristol Smooth Cardstock and did some ink blending with these 
6 Distress Oxide Inks:

Candied Apple 
and

I cut the Heart Panel Die out in black and white and laid them on 2 different rainbow ink blended panels cut using the Embossed Edge Rectangle Dies.  I added the "Love" word die from the 
I Love You Shadow Dies on both cards.  One is white backed in black and the other is black backed in white.


I have a process video up on my YouTube channel showing how I made both of these cards.
You can watch it here or on YouTube.


I hope you enjoyed my rainbow cards and they have inspired you to get inky!

Check out my other blog post using the Heart Panel Die to DIY your own stencil! There's a video along with that process as well!
DIY Stencils 

That's all for today, don't forget to follow Kat Scrappiness on all
social media platforms to be alerted to new release, sales and giveaways!


Have a great day, I already am!
πŸ’“Lisa πŸ’“

**Affiliate links are used occasionally
at no additional cost to you. These
are products that I may have been sent
or ones that I purchased on my own.
Either way, they are products that I 
use frequently and LOVE!