Showing posts with label Ellen Hutson. Show all posts

Tuesday, October 5, 2021

Disney Coffee!


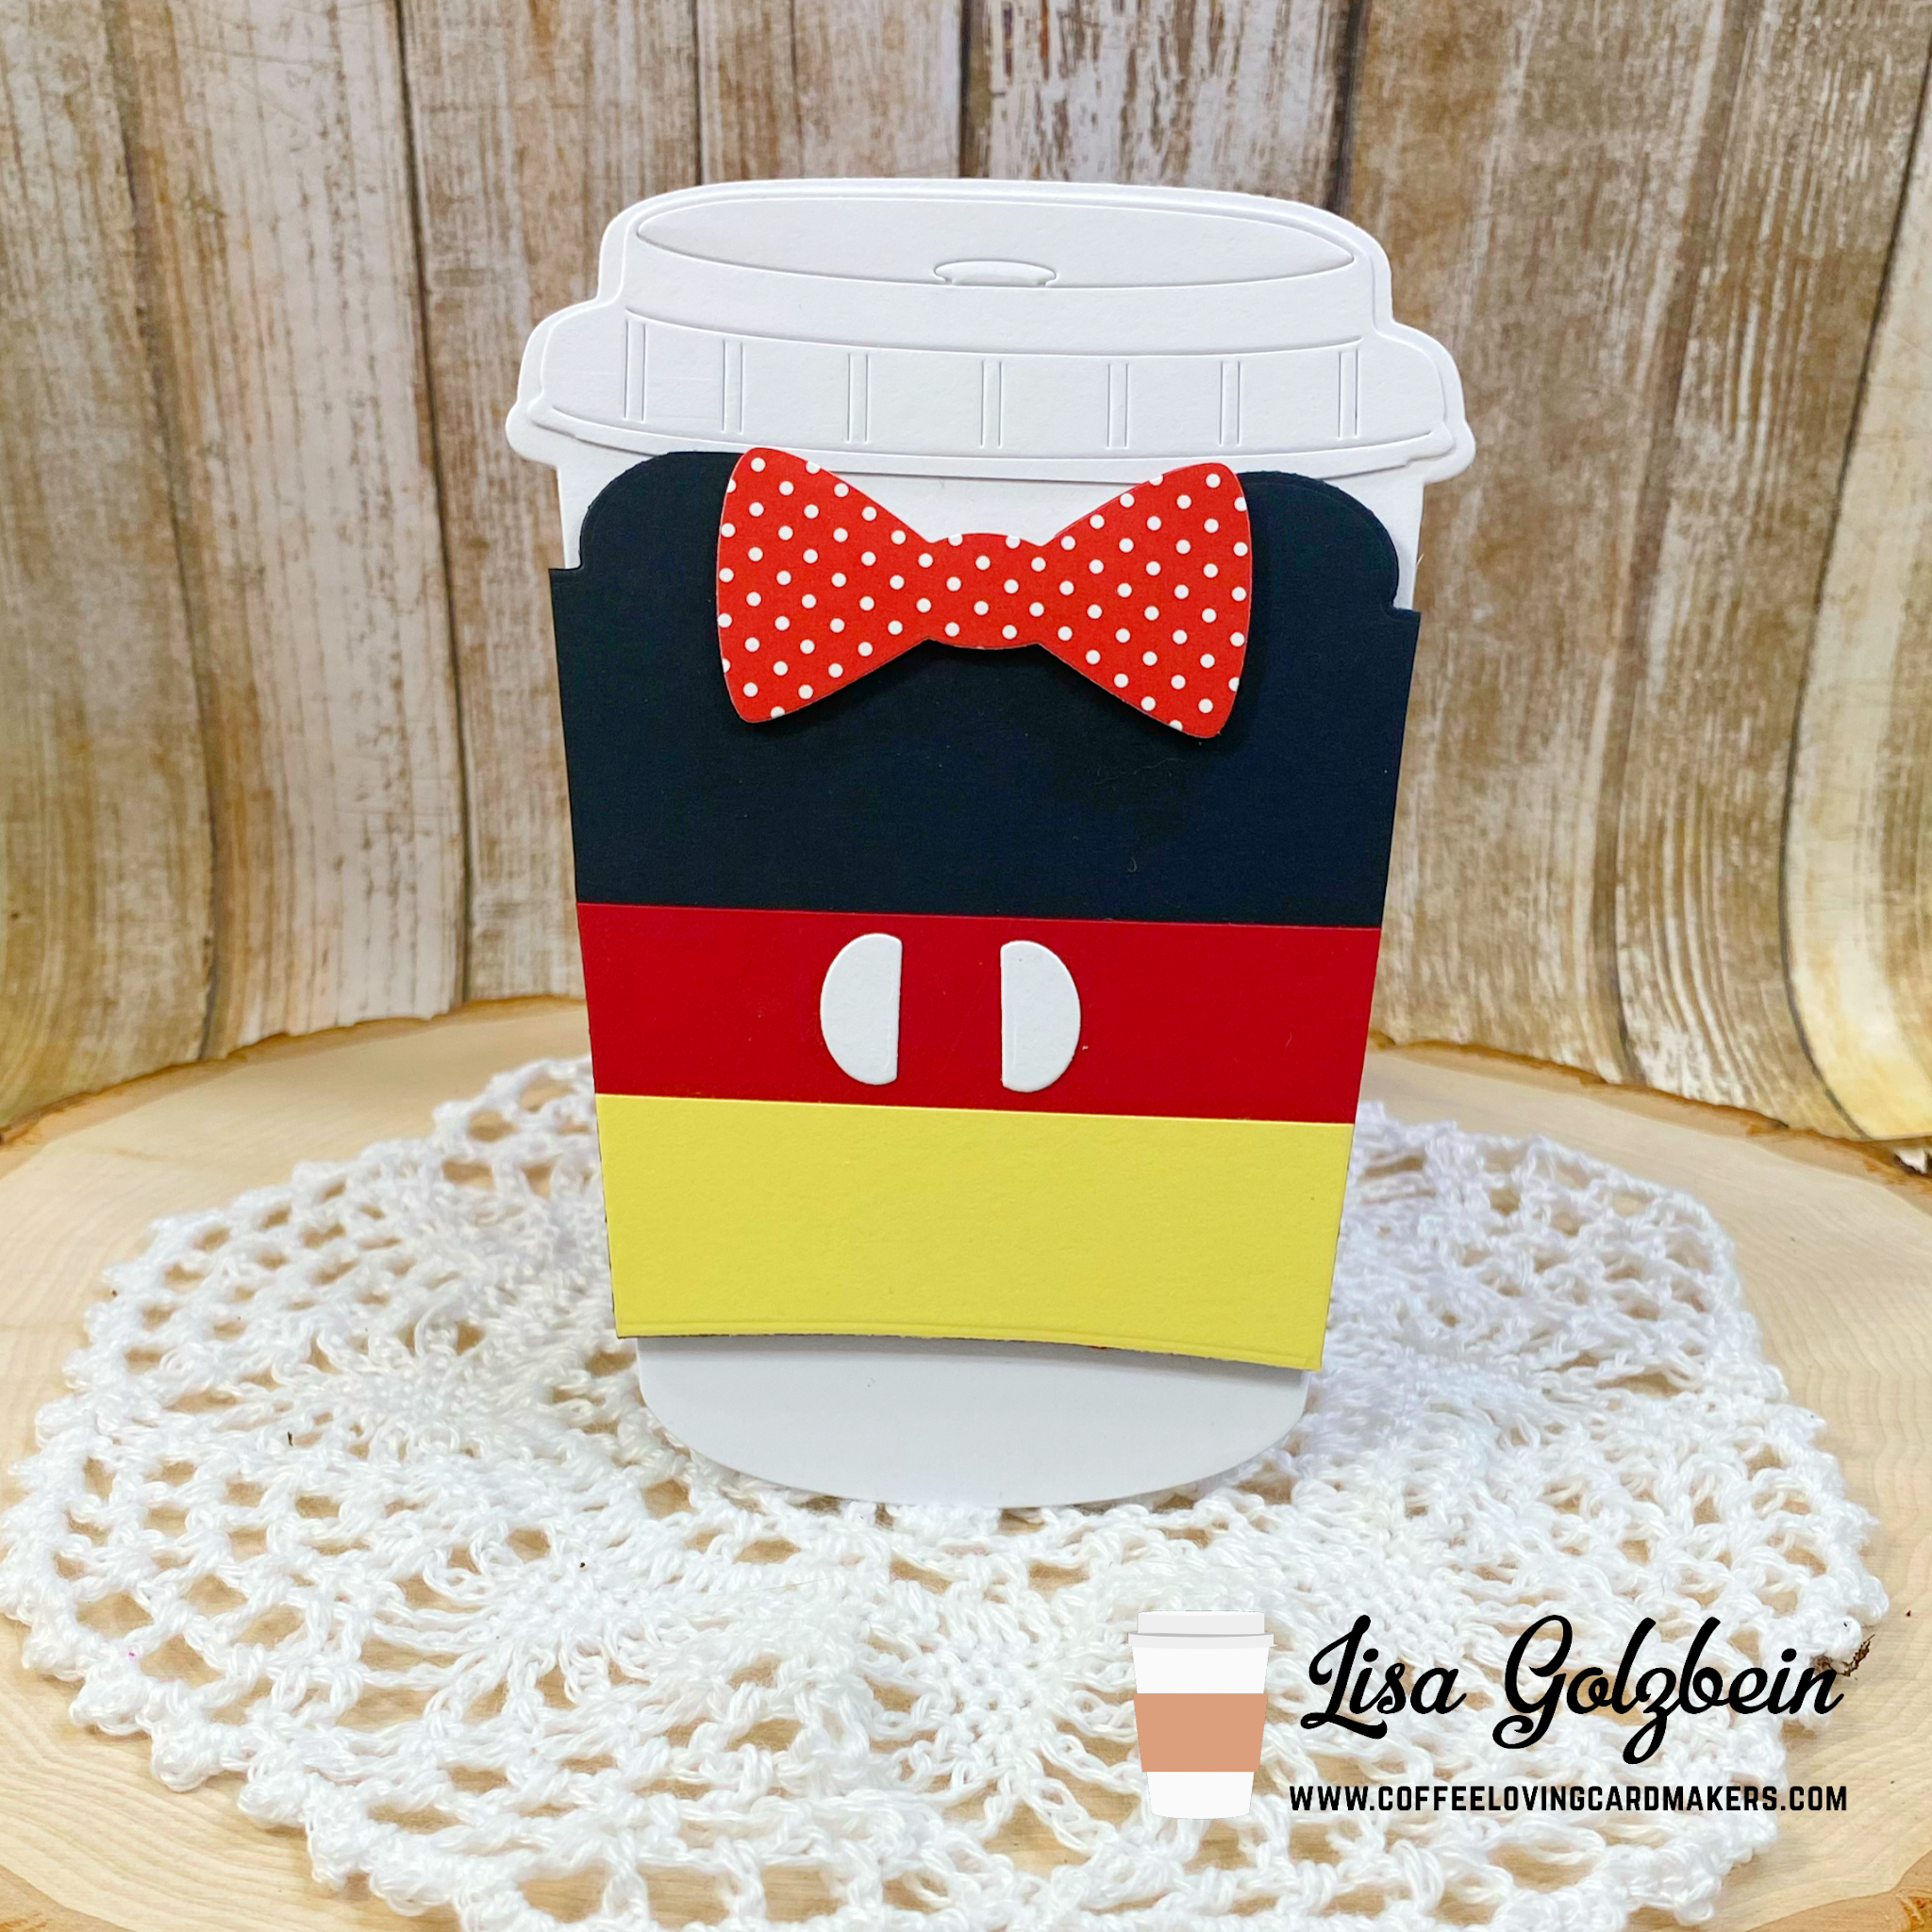
Welcome Coffee Lovers! Today I am up on the Coffee Loving Cardmaker's blog with a couple of famous mice! It's amazing how iconic a rodent can become if you dress them in black, red and yellow and relocate them to Orlando or California!

❤️ πŸ’› πŸ–€ πŸ˜‚ 🐭 πŸ˜‚ ❤️ πŸ’› πŸ–€ 


These famous fun loving Mickey and Minnie themed coffee cups were made using the 
Bear Cozy Kit from super sponsor Ellen Hutson.
This kit features enough materials to make TWELVE cozies!

* 10 piece die set
* 6 colors of Essentials by Ellen Wool Felt 8 1/2" x 11"
*6 colors of DMC Floss
* Large vinyl mesh zippered storage pouch


Instead of using the felt in the kit I decided to make these cups out of cardstock. If you're interested in seeing the cups I made using the felt from the kit, you can check out this blog post:


Here is a closeup of the Mickey inspired cup using the dies from the Bear Cozy Kit :


And here is Minnie! The bow from the kit was the perfect addition to my Minnie cup!


I just love how these cups turned out! 
It's amazing what you can create with a little imagination and some basic shapes!

Thanks so much for joining me today 
Have a great day, I already am!
  Lisa   
❤️ πŸ’› πŸ–€πŸ­❤️ πŸ’› πŸ–€ 

Wednesday, September 29, 2021

National Coffee Day 2021


Welcome Coffee Lovers! Today is National Coffee Day and we have been celebrating all week over at the Coffee Loving Cardmaker's blog! Here is a link to today's post explaining all of the festivities.


There will be a hop featuring all of the Super Sponsors from this past week.

Today I am featuring a project using the Bear Cozy Kit from super sponsor Ellen Hutson.
This kit features enough materials to make TWELVE cozies!

* 10 piece die set
* 6 colors of Essentials by Ellen Wool Felt 8 1/2" x 11"
*6 colors of DMC Floss
* Large vinyl mesh zippered storage pouch


I made 2 projects with this kit and I absolutely adore them!
One is a traditional teddy bear and the other is a unicorn.


For the teddy bear cozy I used all of the dies included in the kit and added some pearls for extra cuteness! I just love how the bow looks on the bear's head.


For the unicorn I paired the dies in the set with a few extra dies in my stash to make the unicorn.
I love how VERSATILE this set is and can be incorporated into almost any animal with a little bit of imagination.
Check out all of the Coffee Lovers DT projects today to see how many other animals you can spot!


Thanks so much for joining me today and make sure to check out the main post to see all of the caffeinated inspiration on the blog today! Make sure to visit the Super Sponsors and show them some love as well, they are all so generous! Here is the link one more time to today's post.


Have a great day, I already am!
 πŸ¦„ Lisa  🐻 

Thursday, February 7, 2019

Coffee Loving Cardmakers Guest Designer

Hello Crafty Coffee Loving Fans!
I am so excited to announce that I will be a guest designer for the
month of February on the Coffee Loving Cardmakers Blog!

Go ahead and grab your cup of coffee or warm beverage of choice,
I'd love to share my card with you today!


This card involves a technique that I 
am addicted to lately. It's not a new technique by any means but I have
been experimenting with it lately using different color combinations.
I have been using distress inks to do ink blending on my backgrounds.
The 3 colors I used on this card are: 
and
I just love how only 3 colors look like so 
many more when they blend together!
I recently saw a card that had some floral stamps that were
heat embossed with white powder over the ink blended background.
I fell in love with that look and re-created it on this card.
Here are the steps I took to make this card:

Step 1: To begin with I took some Bristol smooth card stock and I blended Broken China,
Fossilized Amber and Picked Raspberry with a Ranger Mini Blending Tool.
 Once I liked the look of the blended colors I dried my background
with my heat tool so that I could do some embossing on top of it.


Step 2: Next I took some floral stamps from two older Papertrey Ink stamp sets
(Delightful Dahlia and In Bloom) and I placed them all over the lower
half of my background.  To prep the surface I used my anti-static tool and I used my Tim Holtz stamping platform to position the stamps where I wanted them.
I stamped them with Fresh Snow ink from Papertrey Ink and sprinkled
WOW Opaque Bright White  powder all over them.
I hit the powder with my heat gun and let the magic take place!


Step 3: Once the background was inked, stamped and embossed I took the largest
die from the Kat Scrappiness Wonky Wavy Stitched Rectangle Dies and cut out a panel.
From that panel I cut out yet another panel from the center using the largest die from
the Spellbinders Labels Four dies. (Save the piece that you die cut!)


Step 4: The next step was to make the shaker portion of the card.
I adhered a piece of acetate to the back side of the panel
with the missing die cut shape and then
I placed foam tape all over the border of that panel
to enclose my shaker bits.


Step 5: Now it's time to use the negative shape we die cut using the
Spellbinders die. We'll adhere that shape to front panel of the base of an
A2 sized card. I used a pink card base.


Step 6: This step is optional but I love the extra special touch it gives to a shaker card.
(I took a few colorful sequins and glued them to the background
with the Crystal Katana tool so they would
remain visible even when the card was "shaking".)
After I glued them down I sprinkled the rest of my mix all over the die cut panel.
You could use whatever mix you want, but here is the sequin mix I made:
Sequins by Kat Scrappiness - Neon Barbie
Sequins by Cartwright - Pale Pink, Light Ocean Blue Green
(Yes I went overboard but what can I say........ I LOVE shaker cards!)
You can now adhere the top panel over your lovely shaker extravaganzapalooza!
......is that even a word??🀷🏼‍♀️


Step 7: Ok now that the background and shaker are complete we can work on
decorating the front of the card. I chose that darling bear from the
Ellen Hutson - All Inside stamp set and I watercolored him with my Zig markers.
I also took the coffee cup from the Paper Sweeties - Coffee Planner Stamps
and Copic colored it to put in his furry little hands. I popped him up
on foam tape and boy did he look cute!


Step 8: YOU MADE IT TO THE LAST STEP πŸ˜‚
It's sentiment time!
In the All Inside stamp set there was a sentiment that read
"sometimes you just have to make your own"
and I thought why not finish that sentiment off with........ you guessed it
COFFEE!
I heat embossed the sentiment with WOW Metallic Silver Sparkle embossing powder
on to a Stitched Sentiment Strip Die from Kat Scrappiness and inked the
edges with Picked Raspberry distress ink.
For the COFFEE word I used the  Got Coffee Sentiment Die from Kat Scrappiness.
I took a leftover piece from the ink blended background from step 1 and die
cut the word coffee from it to give it a colorful twist!


PHEW!
This card was a labor of love and I certainly loved making it!
I hope I made the directions easy to follow!
I really love how the card came out and I hope you'll
give it a try. So many fun techniques on one card!


Thanks so much for joining me today!
Make sure to check out the Coffee Loving Cardmakers Blog
for your daily dose of caffeinated inspiration!
You can also find them on Facebook and Instagram!
Have a great day, I already am!
☕️Lisa ☕️


Friday, November 9, 2018

Sled Christmas Tag

While browsing through all of the wonderful Christmas tags on Tracy McNeely's 
25 Days of Christmas Tags event I found an adorable tag on day 1 by Lorraine Aquilina.
She used the cute Picture Book Moose die by Simon Says Stamp and combined it with some beautiful ink blending.  Here is her tag:

I was inspired to make a similar tag and I was looking through my Christmas board on Pinterest to get some ideas. I found an older tag made by  Julia Stainton and she used a stag's head die on her tag and it reminded me of Lorraine's moose.  
Julia made a tag that looked like a sled.
I wanted to CASE her tag and this is what I came up with.  


I just love the rustic look of this tag!
I started with a tag from Papertrey Ink and I cut it out half way and then turned the die around and cut it again to extend the length of the tag. 
The wreath die is from Ellen Hutson and I cut it out twice and layered them together with foam tape to give it some dimension. 


The berries on the wreath were made using  Red Berry Nuvo drops 
The stag's head was cut on my Scan N Cut using a free SVG file I found on the internet. 
I just love the stag's head cut out in gold glitter.  
It adds such an elegant look to the tag!


The word Joy at the bottom of the tag is from a Kat Scrappiness die that actually says "Jolly".  It's called the Jolly Brush Script Word and Sentiment die.  I loved the font but I only needed the word Joy so I cut out the two L's from the die and ended up wih Joy!
Sometimes you have to get creative!
The legs of the sled were made with 2 strips of pink paper that were rounded at one end and curled up. The tag is popped up on foam tape above the legs.
For some extra shine I added some mirrored star embellishments by Tim Holtz and for the look of snow I added some white gel pen dots all over the tag. 
All that was missing was the twine to go through the hole at the top and my tag was finished.

I am entering this tag in the link up for the 25 Days of Christmas Tags, 
why not make a tag and play along too?

Thanks so much for stopping by the old blog today!
I love visitors and I hope you'll leave a comment to let me know you were here!
Have a great day, I already am!
πŸ›·Lisa πŸ›·