Showing posts with label Ink Blending. Show all posts

Wednesday, August 26, 2020

Did Somebody Say Cake?


Hello hello hello! I am so excited because I am up on the Kat Scrappiness blog today with a really fun card I made for my daughter's friend's birthday. I love to take out a bunch of different Kat Scrappiness dies and use them in new and creative ways.  Today I decided to make my own stencils with the Nested Layering Heart Dies. I needed to have a heart shaped stencil to do some ink blending in and I didn't have anything like that.

I started by taking the 3 smallest dies in the Nested Layering Heart Dies and cut them out of some 6x6 stencil sheets from The Crafters Workshop. I just love blank stencil sheets because you can create any stencil you want with dies that you already own. How's that for getting double duty out of your supplies!


I just love using my Distress Oxide Inks to do ink blending and I thought it would look really neat to do some ink blending over an embossed background.
I took a piece of Bristol Smooth card stock and stamped the Unity Faithful Letter background stamp in Versamark embossing ink and sprinkled Brutus Monroe Alabaster embossing powder over the panel. I then heated it until the powder was smooth and melted.
Next it was time to put my stencil to work. I placed my handmade heart stencil all over the panel in different positions even overlapping in certain spots and used 2 different color inks on each heart to get some beautiful blends. I had so much fun making a random pattern using my favorite colors.  I was sort of going for a rainbow effect as much as possible. I just love the look of the text being highlighted over the heart shapes.

I'll be honest, the ink blending looked way better than I thought it would. I was very happy with how it turned out! Once I liked the layout of the hearts, I used the largest die in the Stitched Scalloped Rectangle dies to cut out the panel and give it a finished edge. I used a bright piece of pink card stock to matte the panel on so it would really stand out.

For the sentiment I wanted a bold black die cut for the front and the Hooray w/ Shadow die was the perfect choice. I used a piece of vellum paper to back the black die cut and it looked great against the bright rainbow colors. The two smaller sentiments are from the Taylored Expressions Simple Strips - Birthday stamp set. I just love the look of white embossing on black paper!

And last but not least, what card would be complete without some Sparkling Clear Droplets?
I love how they let the color show through behind them!

I love how this card turned out and I love how with a little creativity and imagination you can create anything you want. You just have to think outside the box sometimes!

Here's another picture with all of the fun Kat Scrappiness products I used on my card:


Thank you so much for joining me today, I'm so glad you stopped by to check out my latest card and I hope you'll check out all the fun stamps and dies over at Kat Scrappiness!

Don't forget to follow 
Kat Scrappiness on all
social media platforms to be alerted to new releases, sales and giveaways!


Have a great day, I already am!
πŸŽ‰   Lisa  πŸŽ‚  

Disclaimer: My blog uses affiliate links 
whenever possible at no additional cost 
to you. I only promote products I actually 
use and love and think other crafters might 
enjoy as well!

Wednesday, February 5, 2020

Lovely Layered Floral Heart


Good morning! Today I'm up on the Kat Scrappiness Blog and with Valentine's Day right around the corner I've been busy creating my favorite types of cards.  I love all things heart related so this holiday is one of my favorites. I've always been drawn to the more feminine and frilly style of cardmaking. My card today was inspired by a card I saw Laura Bassen make while I was scrolling through Instagram. I am in love with the Floral Heart Die from Kat Scrappiness and for today's card I die cut about 6 of them out of heavy white card stock and layered them on top of each other with Nuvo Liquid Adhesive. I just love that added dimension it gives to the focal point.


I just love that look you get when you layer dies on each other.  
It gives so much dimension to your card.

For the background of the card I cut out a panel of Bristol Smooth card stock with the largest Stitched Scalloped Rectangle Die and did some ink blending with these 3 Distress Oxide Inks:


I added some paint splatters over the panel with the same colors 
plus some white paint for added interest.

I used the I Love You Shadow Dies for the simple sentiment on top of the heart. I cut the word "Love" out using silver foil card stock and I used vellum for the shadow die backing. I love using vellum on my projects because I think it adds a very elegant look to my projects. For some extra shine and fun I added Silver Jewels all around the heart to match the silver foil card stock.


To finish off my card I tied a bow using some Lawn Fawn Silver Sparkle cord with a glue dot.
 Here is one more look at my card with all of the dies I used on the card.  I really love how this card turned out. The ink blended background just makes me happy. I love how all the colors blend into each other to make new colors.


Thank you so much for stopping by today, I love sharing my cards on my blog and I hope you'll come back often to see more of my cards! I also post my cards on my FB page and my Instagram account.

Don't forget to follow Kat Scrappiness on all
social media platforms to be alerted to new releases, sales and giveaways!

Kat Scrappiness YouTube Channel

Have a great day, I already am!
πŸ’˜Lisa πŸ’˜


** Affiliate links are used occasionally 
at no additional cost to you. These
are products that I may have been sent
or ones that I purchased on my own. 
Either way, they are products that I use
frequently and LOVE!

Thursday, October 24, 2019

Light Up Halloween


Good morning and welcome to my blog, if this isn't your first visit than welcome back!
Today I am up on The Rabbit Hole Designs blog and I have a fun Halloween card to share with you!
You've got to love a holiday that says......"It's ok to combine orange and purple with each other!"
You wouldn't think that these colors would look good together but I just love them
blended next to each other! Maybe it's that they are so opposite, they do say opposites attract!
Anyway, I just love the color combination and I love the way this card turned out!


The best part about this card is the light up pumpkin!
I used the EZ Lights by Pear Blossom Press.
These lights are super easy to use and make easy work of making light up cards!
They consist of one battery pack attached to 3 mini lights.
I placed the 3 lights under the pumpkins eyes and nose.


Here is a quick recipe for my card:

1) I used the largest Wavy Wonky Rectangle die from Kat Scrappiness to cut a
panel out of Bristol Smooth card stock. (I love this paper for blending Distress Oxide Inks)

2) Blend Distress Oxide inks: Carved Pumpkin into Spiced Marmalade on the bottom and
Wilted Violet into Shaded Lilac at the top. Next I spritzed the panel with water using the 
Tim Holtz Distress Sprayer and dry to give your background a distressed look.

3) Stamp Happy Halloween from the "Boo To You" stamp set in black
ink at the top of the panel and add the little spider around the words.

4) Add grassy border at the bottom of the panel to ground your card. I used patterned paper
from the Queen and Co Dots Paper Pad and I cut it out using the Lawn Fawn
Grassy Border Die. I also sponged the top of the grass with dark green ink to give it a little depth.

5) Stamp the pumpkin image from "Hey Gord-geous" in Gina K Amalgam Ink
and color in with various Copic Markers. I added Gina K Glitz Glitter Gel to
hat, eyes and mouth for a little sparkle. Die cut pumpkin with matching die.

6) Lastly tape the EZ Light battery pack to a piece of black cardstock measuring
5 1/2" x  4 1/4" and place foam tape all over panel avoiding battery pack.
I placed my battery pack on the bottom left of the card
and threaded the 3 lights up through the bottom right of the main panel. I adhered the
3 small lights to the back of the pumpkin behind the eyes and mouth. I placed my pumpkin on foam tape to leave room for the lights and then I adhered the main panel down to the black panel.
Press purple button on battery pack and prepare to be amazed!


** I added a small half circle over the battery pack and hand wrote
"push here" however there are stamp sets available that already have these sayings.
Here is one by Lawn Fawn:


This card was so much fun to make and the EZ lights make quick work of light up cards!
In no time you can have a fun interactive card that will amaze your recipient!

Thanks so much for stopping by my blog today!
Don't forget that you can purchase The Rabbit Hole Designs products at


For more inspiration, updates, and news make sure to check out these links.


Have a great day, I already am!
πŸŽƒLisa πŸŽƒ

Disclaimer: My blog uses affiliate links 
whenever possible at no additional cost to you. 
I only promote products I actually use and love 
and think other crafters might enjoy as well!

Saturday, January 12, 2019

πŸ’˜Love Is In The AirπŸ’˜

Happy New Year crafty friends!
I want to wish you a happy early Valentine's Day as well
since this post will be centered around the newest
Kat Scrappiness "Love" themed products!

There was recently 4 new products released in the shop and if you
haven't seen them yet, WHAT ARE YOU WAITING FOR?

Kat Scrappiness just released 3 new dies and 1 new stamp set to help
get you in the Valentines mood!


Valentine's Day has always been one of my favorite holidays
mostly because of the color scheme and pretty hearts.
I've always loved the decorations and the way the stores look
at this time of year.  It's a wonderful sea of pink and hearts!
πŸ’˜πŸ’˜πŸ’˜πŸ’˜πŸ’˜πŸ’˜πŸ’˜

I created 3 cards with the new products that I'll share today and I have
some process pictures to share with you for one of them.

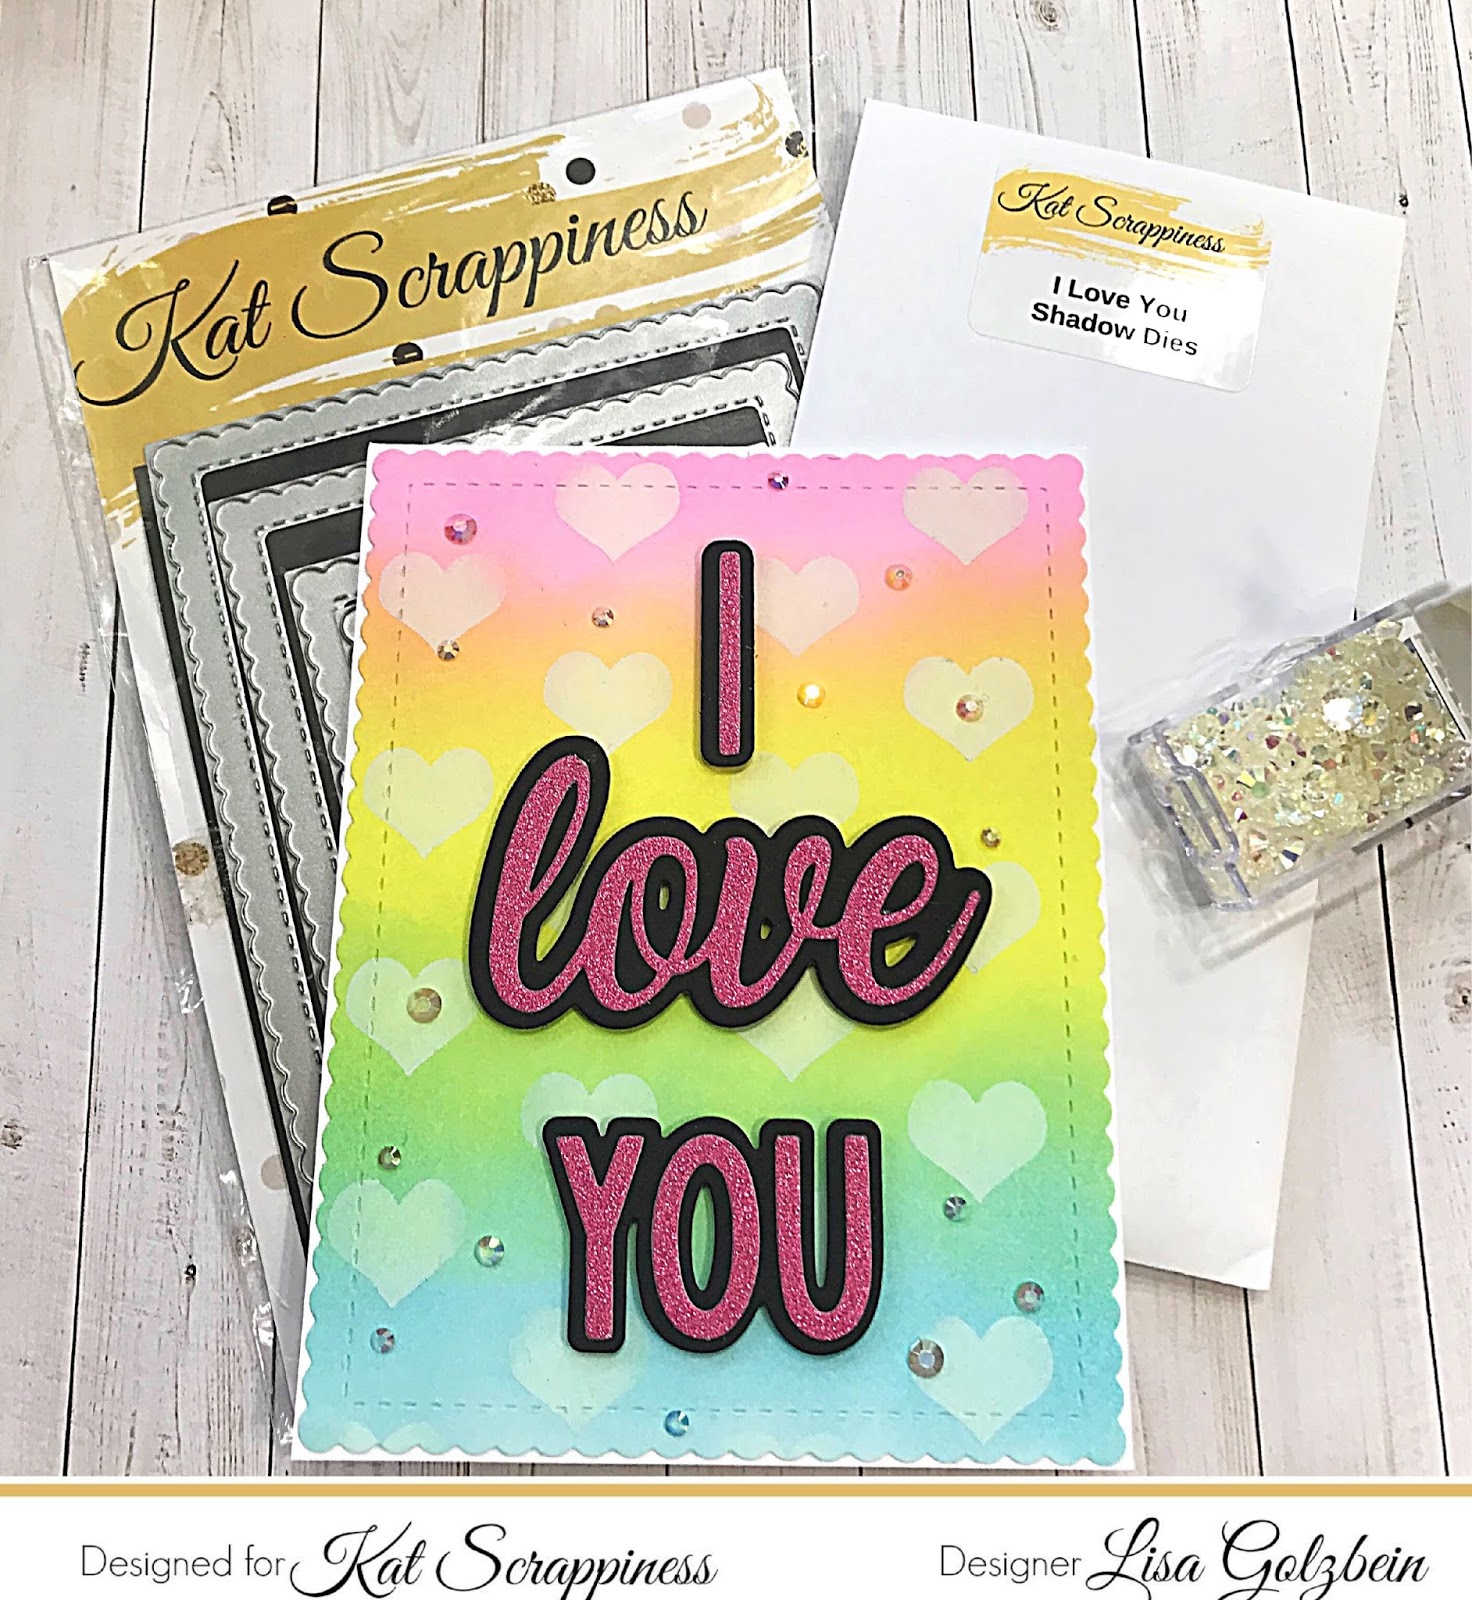
Here is the first card I made using the I LoveYou Shadow Dies
and I'll share the process with you.


For this card I made my own background by ink blending
3 different distress inks in the following colors:
and

Even though I only used 3 colors it looks like so much more
because of the blending properties of the distress inks!
This is my favorite color combo right now and I 
am reaching for them a lot!

Once I got the background blended just the way I wanted it
I pulled out a heart stencil from my stash and used it to
cover the background in soft white hearts.
I had an old makeup brush on hand that worked perfectly
to apply the white ink.

After the hearts were stenciled in I hit the panel with my heat gun 
so it wouldn't smear in my Vagabond.
out the panel for the front of my card.


The next step was to pick out colors that I wanted to die cut
I knew I wanted the shadow pieces to be black since
it makes the rainbow colors pop.
I decided on some sparkly pink paper for the actual words.


Once I adhered the words to their black shadows I popped them 
all up on foam tape so they would really stand out on the card.
And of course I needed to add some Sparkling Clear Jewels to the card
for some extra BLING!


I really love how this card turned out and I am planning on making a lot 
more ink blended cards in the near future.

Here are all 3 cards I made for the new release and I can tell there 
will be a lot more LOVELY HEART cards very very soon!
As you can also see I used the ink blending technique on all 3 of 
these cards in different ways.


Thanks for stopping by today and letting me share my cards with you!
I am enjoying the new stamps and dies and I know you will too!
Please use my code Lisa10 to do some crafty shopping and 
you can save 10% on your order.

Have a great day, I already am!
πŸ’˜LisaπŸ’˜