Showing posts with label Punny Snacks. Show all posts

Friday, November 30, 2018

Cheat Day Shaker Card

Good morning crafty friends!
It's my turn on the Kat Scrappiness blog today and I have a fun circle shaker card to share 
with you!  There are some super fun new Sprinkle confetti mixes in the store 
now and they inspired this card.  
They should probably come with a warning label that says:
DO NOT EAT!!!
Seriously though, they look exactly like the sprinkles you would
order in your favorite ice cream store!


For my card I cut 2 circles out of patterned paper using the Double Stitched Circle Dies.
I cut a window out of one of them using the same dies. I backed the window with acetate
and framed the circle opening with foam tape. After I made my well to add my shaker bits
I added lots and lots and lots of Birthday Cake Sprinkles Embellishment Mix and 
Fairy Dust Confetti Sequins.  The two complimented each other so well!
For the front of the card I colored some ice cream and donut images from the
Punny Snacks Stamp Set and I added a sentiment from the Cheat Day Stamp Set !

Such a fun card to make!
Make sure you check out all of the new sequins in the shop right now,
there is Chocolate Cake Sprinkles as well!

Thanks so much for stopping by today!
I hope you enjoyed my shaker card today and if you'd like to purchase any of the products
I used on this card, you can use code Lisa10 to save 10% on your purchase!
Have a great day everyone, I already am!
๐ŸฉLisa๐Ÿฆ


Friday, October 5, 2018

Matchbook Pop-Up Gift Card Holders and a Video

Welcome back to my the blog!
I'm here with you today and I have a fun project to share!
Since the holidays are just around the corner and gift cards are
such a popular gift giving idea,
I thought I'd show you a cute way to package them.
I made a matchbook to put them in so that they pop-up when you open them!

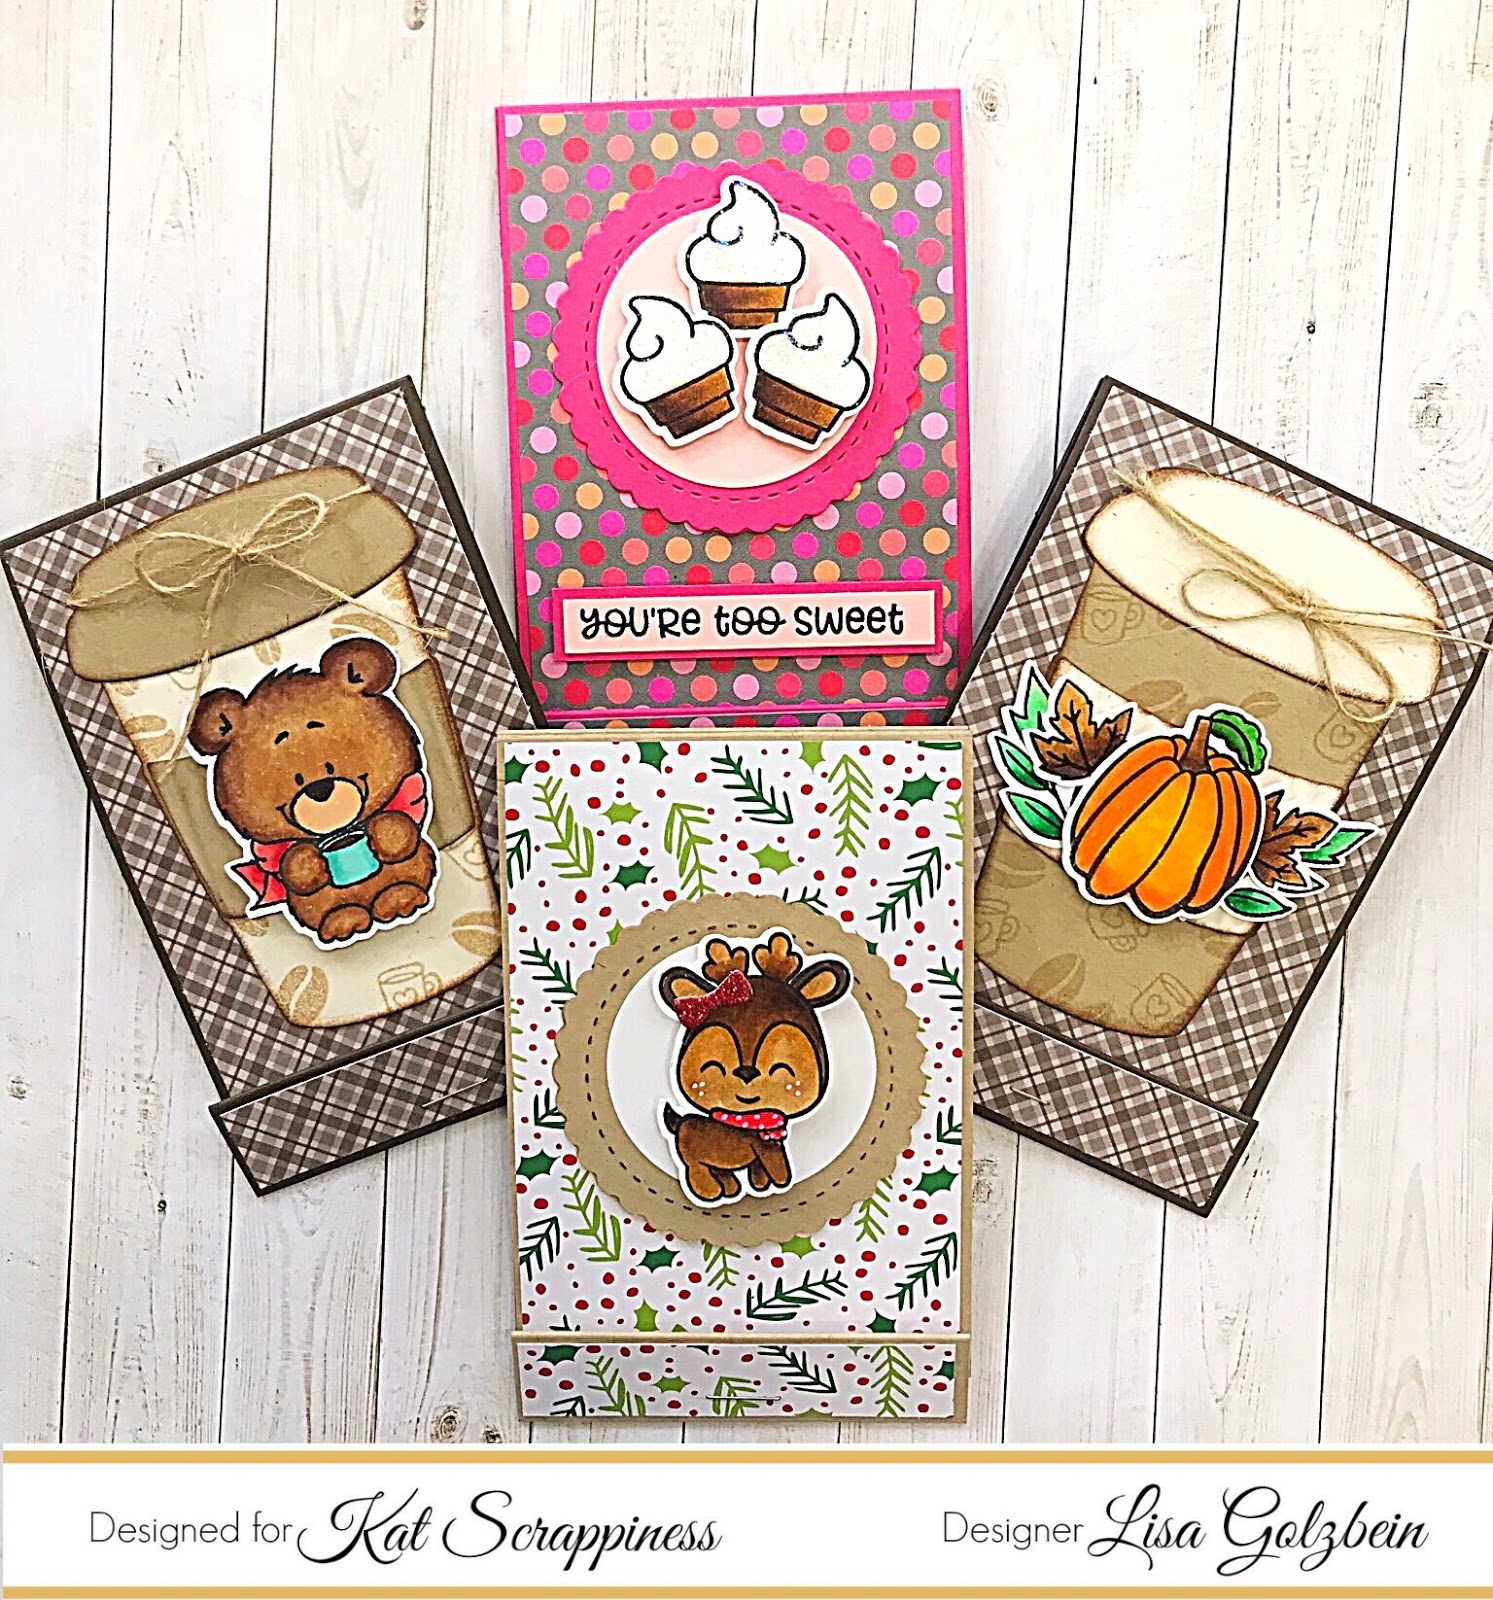
I made 4 matchbook gift card holders and decorated them with various 
stamps and dies from the Kat Scrappiness shop.

Here is a look at all 4 of them:


And here is how they look when you open them and the gift card pops up:


Aren't they adorable!
The fun part is that there are so many ways to decorate them and they can be used for any holiday or occasion depending on the paper and embellishments you use.


I also filmed a video to show you how to make your own.
I used 5 different stamp sets on my matchbooks, 3 of which were just released at 
Kat Scrappiness along with many various dies also available in the shop.

In the video I'll show you all of the products used on each matchbook and
I'll go through a quick tutorial on how to make your own!
It's really simple and they come together very quickly once you've made one.
I'll have all of the measurements in the video that you will need.

Heres a link to the video on YouTube.


As always, thank you for joining me today! I hope you'll give one of these matchbooks a try. It will give your gift cards a facelift and you'll have fun making them!
All of the products I used in today's project are listed and linked below.
If you want to purchase any of these fun products at Kat Scrappiness, you can use
my code Lisa10 and save 10% on your order!

Have a wonderful day, I already am!
๐Ÿ›Lisa๐Ÿ›


Products Used on Matchbooks:  

Wednesday, May 30, 2018

Mini Treat Bags

Hello again crafty friends!  I'm back today on the Kat Scrappiness blog to bring you another cute project!  I made 3 adorable mini treat bags using the Stitched Heart Tag die and I decorated them with the Stitched Flag dies and the Double Stitched Circle dies.  I have a video for you today to show how I assembled the bags and it's super easy to follow.  I have to thank my fellow Kat Scrappiness design team member Maria Russell for the fabulous idea to make the bag.  She did a video a while back showing the process and I remade the bags using some current stamps and dies.  

This is the bag I assembled in my video and I used a sentiment from the Punny Snacks stamp set.  
The pretty patterned paper is from the Lawn Fawn paper pack, Gotta Have Gingham .  I started with 2 die cut panels from the larger die in the Stitch Heart Tag dies. I then cut a coordinating piece of paper to 11 7/8" x 2" to attach the 2 die cut panels together.  Next you will score your paper on the 11 7/8" side at 4" and 7 7/8" and then you will score the paper 1/4" in from both sides on the 2" side.


After you score your strip fold on all the score lines and make 
4 snips where the score lines meet each other.


The next step is to place some strong double sided adhesive along the middle sections to 
adhere the 2 heart tags.

Next you want to apply some additional double sided tape to the remaining scored flaps and assemble the box accordingly.


The video will show the assembly process step by step.  The only thing left to do is decorate the front of the box and fill it with pretty tissue paper and treats!
I die cut several Stitched Flag dies from some more gingham paper and arranged them around one of the Double Stitched Circle dies.  I stamped a sentiment from the Punny Snacks stamp set on to a scalloped circle and adhered it to the circle on some foam tape.  
I made the same box with some different patterned paper but essentially followed the same steps.

I also created the same bag a third time for the Coffee Lovers Bloghop that Kat Scrappiness is a super sponsor for.  I used the Layered Coffee Cup die and the "Got Coffee" sentiment die for the front of the bag and I finished it off with a sentiment from the Technique Tuesday stamp set "Sassy Coffee"
I stamped the sentiment on to a Stitched Flag die and finished off the front panel with some paint splatters of Ground Espresso distress ink.

These treat bags are super fun to make and they are very quick and easy to assemble.  They would make great party favors for a kids party or even elegant favors for a wedding or anniversary party.  
Here is a link to the YouTube video showing how to assemble these cute bags.


Thanks for joining me today!  All supplies used are linked below.  
I hope you'll give this technique a try!
Don't forget to use code Lisa10 at KatScrappiness.com to receive 10% off your order at checkout.
Have a great day, I already am!
๐ŸฌLisa ๐Ÿฌ


Monday, March 5, 2018

Video: Kat Scrappiness Design Team Project: Out of the Box!


I am very excited to be posting my first design team project for Kat Scrappiness.  Up on the blog today I am sharing a fun new project using one of the adorable new stamp sets available this month.  It's called Punny Snacks and it features some really cute food stamps and some cute punny sayings.  I decided to think "outside the box" for my project and create a mini pizza box to hold some small note cards that are food themed as well.  This little box could also be a 3-D card by itself or it could hold a gift card as well.  
When I first got my hands on this fun stamp set I immediately broke out my copic markers and colored up all of the cute little food stamps.  I made a chart showing the exact colors I used for each stamp to save me time later when I wanted to use them again.  Here is the chart all colored with a list of all the copic markers that I used if you're interested.


The only marker I didn't list was the colorless blender, marker "0", which I used to draw some color away from the hamburger bun to give the appearance of seeds.  

The first thing I did was create the mini pizza box to put the note cards in.  It looks complicated but in my video I will show you step by step how to assemble this cute little box.  

The next step was to decorate the top of the box with some traditional red gingham patterned paper to match the decor of a real pizzeria.  I added the sentiment "you have a pizza my heart" to the top and I hand cut two slices of pizza to pop up on opposite corners of the box.  


I then made 5 cute little notecards to fit inside of the box.  I used the rest of the food stamps and funny puns to decorate the top of 5 mini note cards.  I used the Stitched Postage Stamp Edge Rectangle Dies to showcase the stamps and sentiments on the cards.  
I just love how they all look together with all those fun colored images!

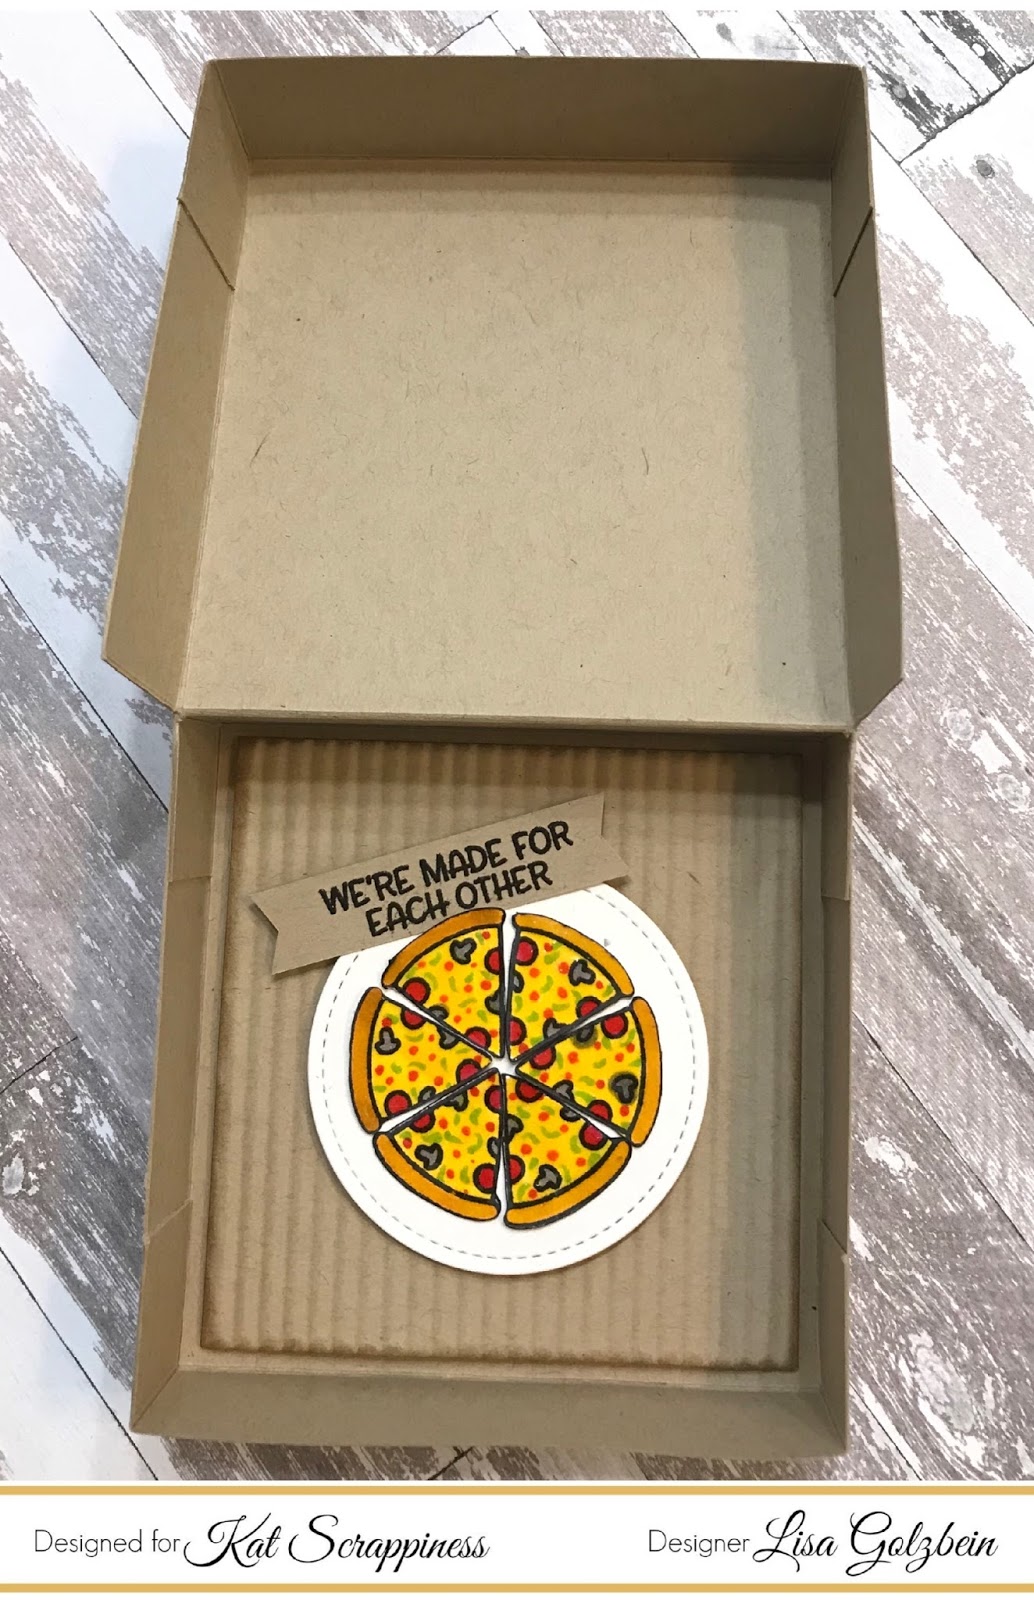
The last step was to decorate the inside of the box so it could be used on its own as a 3-D card or gift card holder.  I colored and cut 6 slices of pizza and assembled them on a white circle to resemble a pizza pie.  Just for some added interest I used a paper crimper to give some texture to the bottom piece of paper in the box and make it look like corrugated cardboard.  I also added the sentiment "we're made for each other" to finish it off.

This was a super fun project to make and you can watch the process in a video below or on my YouTube channel.  I will list the products below with links.  


Be sure to check out all of the new products at Kat Scrappiness and use 
code: LISA10 to get 10% off your order at checkout.
Have a great day everyone!
I already am!
๐ŸŒญ๐ŸŒฎ๐Ÿ”๐Ÿ•Lisa๐ŸŸ๐Ÿฆ๐Ÿฉ๐Ÿฅค


Products used: