Showing posts with label Wonky Wavy Stitched Rectangle. Show all posts

Thursday, November 26, 2020

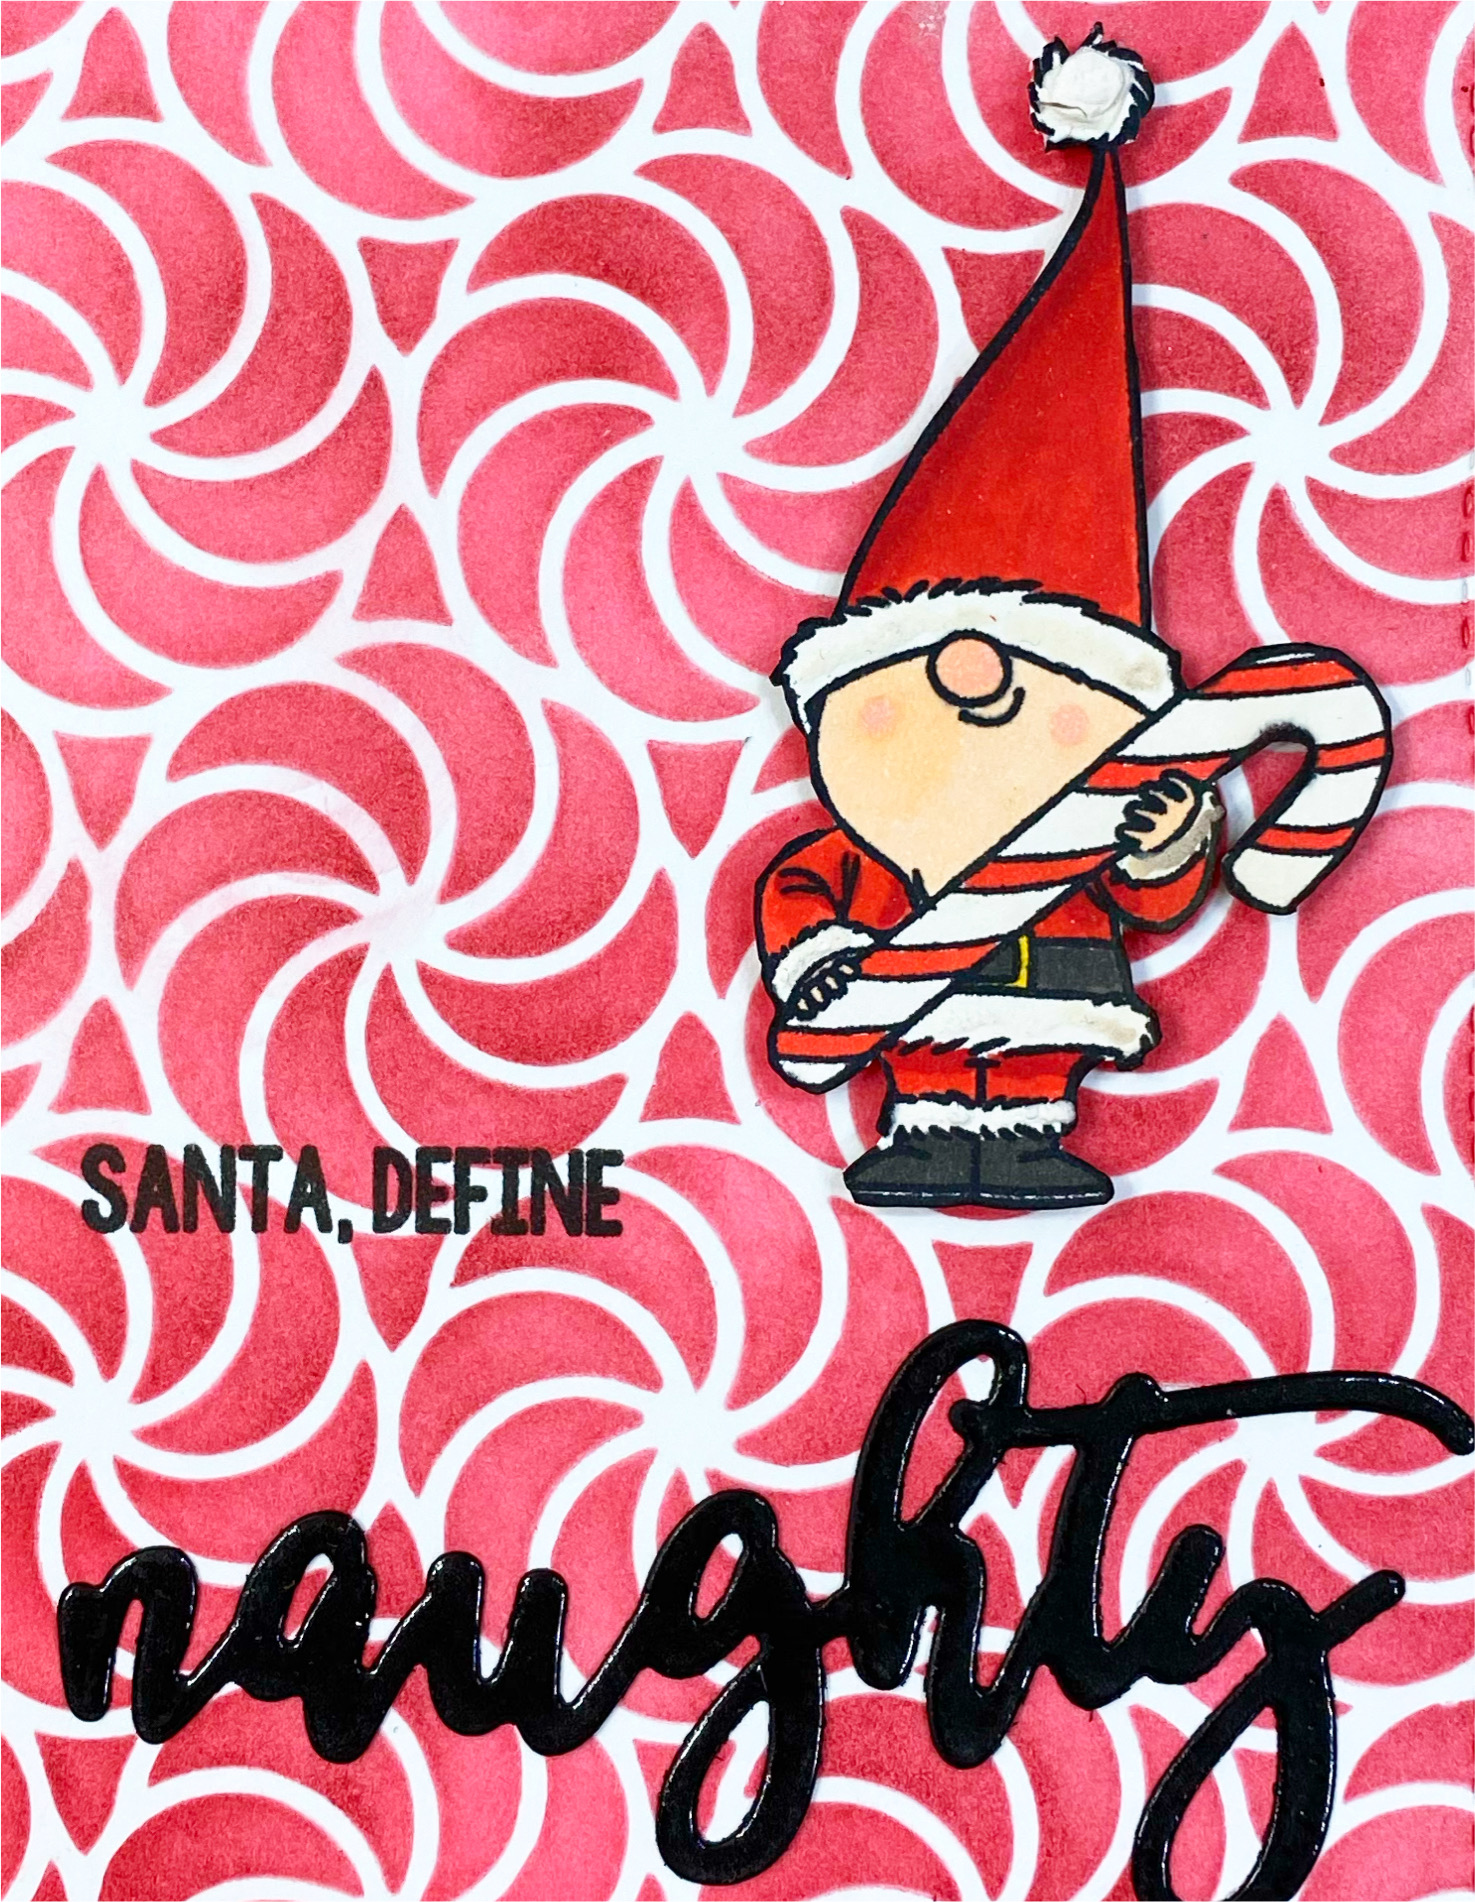
Santa... Define Naughty!


Happy Turkey Day to all of my crafty peeps! Today I'm up on the Kat Scrappiness blog with this cheeky Christmas card! The Naughty Christmas Stamp Set with matching Die has the funniest sentiments and this really great scripty "naughty" word die cut.

I started by stenciling a fun background that resembles the Starlight mints that are so popular this time of year. After my panel was all stenciled I cut it out with the largest die from the 
For my focal point I colored one of the gnomes from the Christmas Gnomes Stamp Set with my Copic markers and then I gave him some dimension by using a snow marker on his hat and boots. 
The sentiment and "naughty" die cut are from the Naughty Christmas Stamp Set with matching Die and I decided to make the die cut nice and shiny by heat embossing it with clear embossing powder!


Here is one more pic with all the supplies used on today's card.


Thank you so much for joining me today! Make sure to check out 
Kat Scrappiness for all of your holiday card making needs! 

Don't forget to follow 
Kat Scrappiness on all
social media platforms to be alerted to new releases, sales and giveaways!


Thanks for stopping by and enjoy your day, I already am!
πŸŽ…πŸ»  Lisa  πŸŽ…πŸ»

Wednesday, June 12, 2019

Paw Print Sprinkles Shaker Card


I'm up on the Kat Scrappiness blog today with a fun shaker card!

All you need is LOVE and a dog (or a cat)....... and maybe some Paw Print sprinkles!!
Today in the Kat Scrappiness shop there are over 30 new sequins and sprinkles mixes 
that were recently released
and they are SUPER CUTE and SUPER COLORFUL and SUPER SPARKLY!!!
You are definitely going to want to check them ALL out!
For my card today I am featuring my favorite one. It's called Paw Print Sprinkles.


HOW STINKIN' CUTE ARE THOSE TINY LITTLE PAW PRINTS???
The minute I saw them I knew they needed to be paired with Kat's Pet Sentiments Die Set!
They are the perfect addition to the paw print die!


Here is the Card Recipe:

  • I started with a black A2 card base.
  • Next I took the Wonky Wavy Stitched Rectangle Dies and cut out a white layer with the largest die from the set.
  • Now I cut out 3 letters from the Large Alphabet Dies (L, V and E) in red card stock. I laid them out on my white panel so I could position the paw print from the Pet Sentiments Die Set where the O in love would be.
  • I ran the white panel through my die cut machine and cut out the paw print on a slight angle.
  • Once the paw print was cut I backed it with acetate and built foam tape all around it so I could make it into a shaker element.
  • I made sure to section off the bottom of the paw print separately from the top 4 holes so I could add 2 different shaker mixes inside the paw print.
  • The bottom of the paw got the Paw Print sprinkles and the top 4 holes got the red Heart Sprinkles . 
  • I applied the shaker panel to the base of the card and added my 3 Large Alphabet Dies and the outline of the paw print in black to the front of the paw print shape.
I am super happy with how this card turned out! I just love those sweet little Paw Print
shaker bits and I love how they look inside the paw print die!
If you are interested in purchasing any of the Kat Scrappiness products I used 
on my card, don't forget to use code LISA10 to save 10% on your order at checkout.

Thanks for stopping by and have a wonderful day!
I already am!
🐾Lisa 🐾


Thursday, July 12, 2018

Mini Notecards by Lisa


Good morning crafty friends! 
I'm over on the Kat Scrappiness blog today to bring you a sweet mini trio of notecards. I have an easy technique that I think you are going to fall in love with. We are going to make mini notecards using the nested dies we all love and reach for all the time for our regular sized cards. The finished size of each card is approximately 4 1/8" x 2 3/4". What you need is the largest die from any of your nested die sets.  I've used rectangles but squares would work as well.  The 3 nested die sets I've used are the Stitched Postage Stamp Edge Rectangles, the Stitched Scalloped Rectangles and the Wonky Wavy Stitched Rectangle Dies. 


For my trio of sweet cards I used patterned paper for the card base for some color and variety but any paper or card stock would work.


 After I die cut the largest size die from each set, I folded the paper in half to create a mini card.  


Then comes the fun part! Decorate to your heart's desire! I added a piece of white card stock to the front of each mini card and stamped a background with florals and then popped the focal points up on foam tape. I used the Scripty "Hello My Crafty Friend" die as the sentiment on 2 of the cards. I finished each card off with some pretty colored twine and 3 sparkly sequins from the Barbie Sequin mix. I stuck with the rule of 3 to place my sequins down and it was just the right amount of added sparkle. Since the card base is made from dies that have decorative edges, your cards will have 3 fancy edges that are so pretty!


Making these mini notecards is a cinch and uses dies that you probably already have in your stash.  Kat's nested dies are the perfect size to create these mini cards. It might not be a new technique but it sure is fun! Small notecards are perfect for lunchbox notes, quick thank you cards or for any occasion that calls for a quick small card! For some added fun you can make your envelope out of the same patterned paper to match your card.  The possibilities are endless!
All supplies used are linked below.
Thank you so much for joining me today and don't forget to use code Lisa10 to get 10% off your order at checkout.
Have a great day everyone!
I already am!
πŸ’LisaπŸ’