Showing posts with label sparkling clear jewels. Show all posts

Wednesday, August 12, 2020

The Masked Heart


Hello and welcome to my blog! Today I have a fun card to share with you using some various Kat Scrappiness dies to make this beautiful one layer card.

All the credit goes to a video I saw recently by Cathy Zielske where she did this technique and I wanted to recreate it with some KS dies today.

Have you ever used masking paper? If not you really should give it a try! It's a lot of fun and you can get some really cool effects with it. Essentially it masks off a part of your paper so you can make a design within a certain shape. Another use is to mask off stamped images so you can ink blend a background around them and maintain a one layer card.

For today's card I will be masking off my card panel using a heart shape opening so that my design will have a heart shape when I pull up the masking paper.

Here's the process:

I started by cutting out a panel of 110 pound Neenah card stock with the largest Stitched Rectangle die.


Next I cut out a piece of masking paper that was just slightly larger than my panel and then I cut a heart out of the center of it using one of the hearts from the Layering Hearts die set. Once the heart was cut from the center of the masking paper I laid the paper over the card stock panel so I could start my stamping.


I chose a simple stamp that resembled a flower and I used 3 different distress oxide inks to stamp the flowers in the heart making sure to overlap the edges of the heart and fill it up completely. Once I stamped all of the flowers in all of the colors, I went back over each of them and did some basic ink blending in the same exact colors.


Once the stamping and ink blending were done it was time for the big reveal!
I made a very short video to show you how it looked when I pulled the masking paper off.


I could watch that video over and over again, it's so satisfying!

Once the heart was revealed it was time to decorate the rest of the card.  I used the Friendship Greetings stamp set for the sentiment. In the center of the heart I stamped the "You are Beautiful" sentiment with black ink and I stamped the second sentiment on black card stock and embossed it with WOW white embossing powder and popped it up on foam tape under the main sentiment.


And of course I cannot leave well enough alone and I just have to add jewels to all my cards!
The Sparkling Clear Jewels are hands down my favorite jewels and I use them on almost every card.


Here is one more look at my card with all of the Kat Scrappiness dies and stamps pictured.


I really had fun making this card and if you haven't tried masking paper on your cards I highly recommend it. There are multiple videos on YouTube showing the various techniques you can do.

Thank you so much for joining me today, I'm so glad you stopped by to check out my latest card and I hope you'll check out all the fun stamps and dies over at Kat Scrappiness!

Don't forget to follow 
Kat Scrappiness on all
social media platforms to be alerted to new releases, sales and giveaways!


Have a great day, I already am!
🧑  Lisa  πŸ’š

Disclaimer: My blog uses affiliate links 
whenever possible at no additional cost 
to you. I only promote products I actually 
use and love and think other crafters might 
enjoy as well!

Tuesday, May 5, 2020

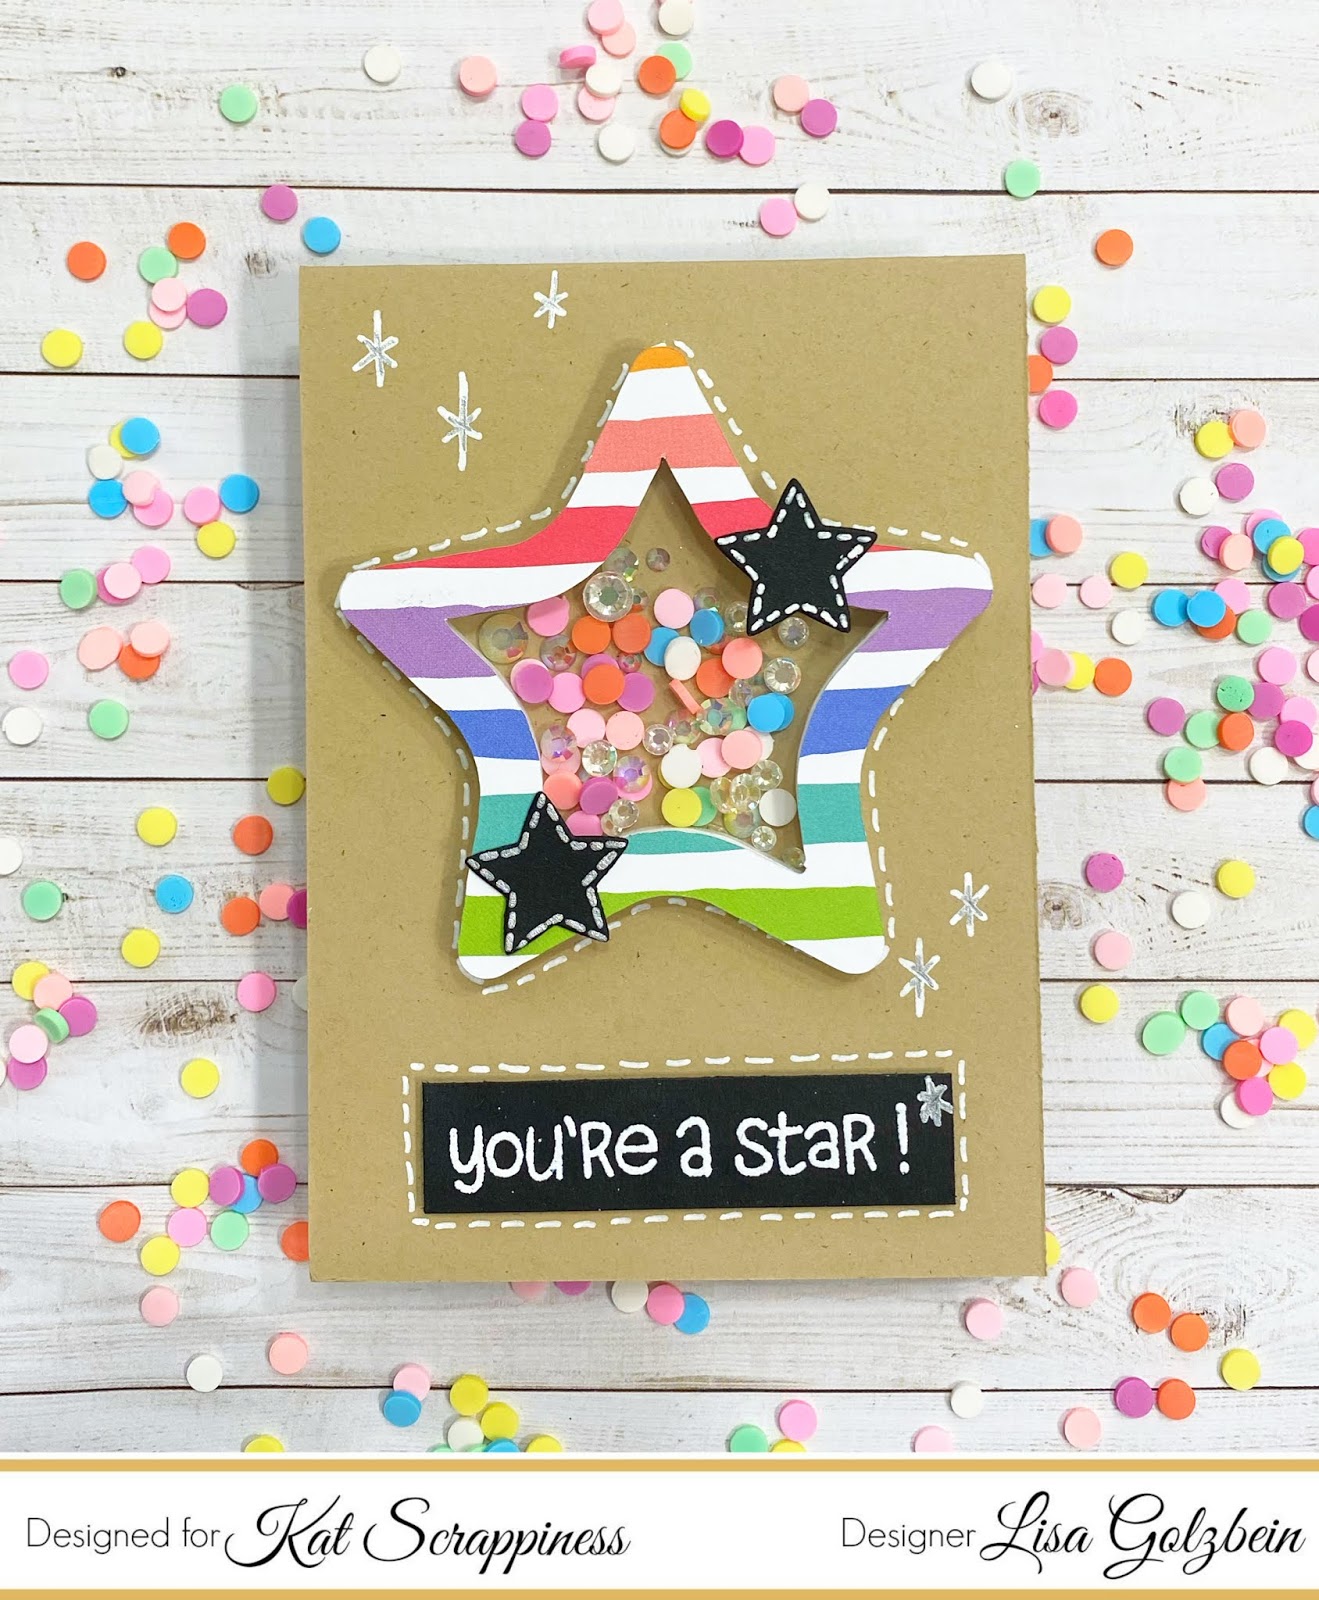
You're a Star Shaker Card


I'm shakin' it up today on my blog!
Kat Scrappiness has the most awesome shaker kits and they are super easy to use!
For my card today I used the Star/Splat Shaker Dimension Set and I filled it with some Party Confetti Sprinkles and some Sparkling Clear Jewels. There are lots of shaker kits available in the shop, here is a list of some of the newer ones:


Here is a look at the Shaker Kit, Sprinkles and Jewels on my card:


This card was a lot of fun to make and super easy!
I'll walk you through the steps involved in putting it together.

-----------------------------------------------------------------------------------

I started with a kraft card base and I decided to make a smaller card than usual so that the shaker would be the main focus on the card. My card measures 3 1/2" x 10" and is scored at the 5" mark so my completed card is 3 1/2" x 5".

Step 1 - Adhere shaker foam base (included in kit) to front of card using 
Nuvo Deluxe adhesive and give it a minute or two to dry.

Step 2 - NOW COMES THE FUN PART! Add your shaker bits into the well created by the foam. You can choose whatever you want and lucky for you Kat has a TON of sprinkles, sequins, confetti and other fun bits to make your shaker card SHAKE! I chose the Party Confetti Sprinkles and Sparkling Clear Jewels for my card. Make sure you don't add too much so you'll be able to shake those bits!

Step 3 - Prepare die cut top frame. I traced the die cut star frame in the kit on to patterned paper and cut it out. I used a piece of patterned paper from the Honey Bee Over the Rainbow paper pack. If you don't want to fussy cut your shape you could paint the frame or use markers on it or even do some heat embossing like I did on this card → Diamond Shaker Card.

Step 4 - Once your frame looks the way you want it to you can glue the acetate sheet included in the kit to the back of the frame. Now glue your frame to your foam base.  I used Nuvo Deluxe adhesive and it worked perfectly.  

That's it! 4 EASY steps to a super cute shaker card! 

You can decorate the rest of the card however you want but the shaker portion is quick and easy.  I used the Lawn Fawn Lucky Stars stamp set and heat embossed the sentiment on to black paper using a VersaMark Clear Embossing Pad and some Ranger Super Fine White embossing powder. Since I was using white embossing powder on black paper I made sure to prep my paper with the Inkadinkado Embossing Magic Pad first so I would only have powder melting on my stamped words. I also did some extra accents on my card using a White Gelly Roll Pen size 10. I also die cut 2 small stars from the Lawn Fawn Puffy Star Stackables  out of black paper and made white dash lines with my Gelly Roll pen to decorate the large star.

To clean my stamps I always use the Lawn Fawn Stamp Shammy and I store it in the Lawn Fawn Stamp Shammy Case so it's contained and ready to go.

Here's another look at the card with some of the supplies I used:


This card was a blast to make and shaker cards are my all time favorite cards to make!
Thanks so much for joining me today, head over to Kat Scrappiness and check out all of the amazing shaker kits and embellishments to fill them with!

Don't forget to follow Kat Scrappiness on all
social media platforms to be alerted to new releases, sales and giveaways!


Have a great day, I already am!
🌟 Lisa  🌟 

Friday, April 12, 2019

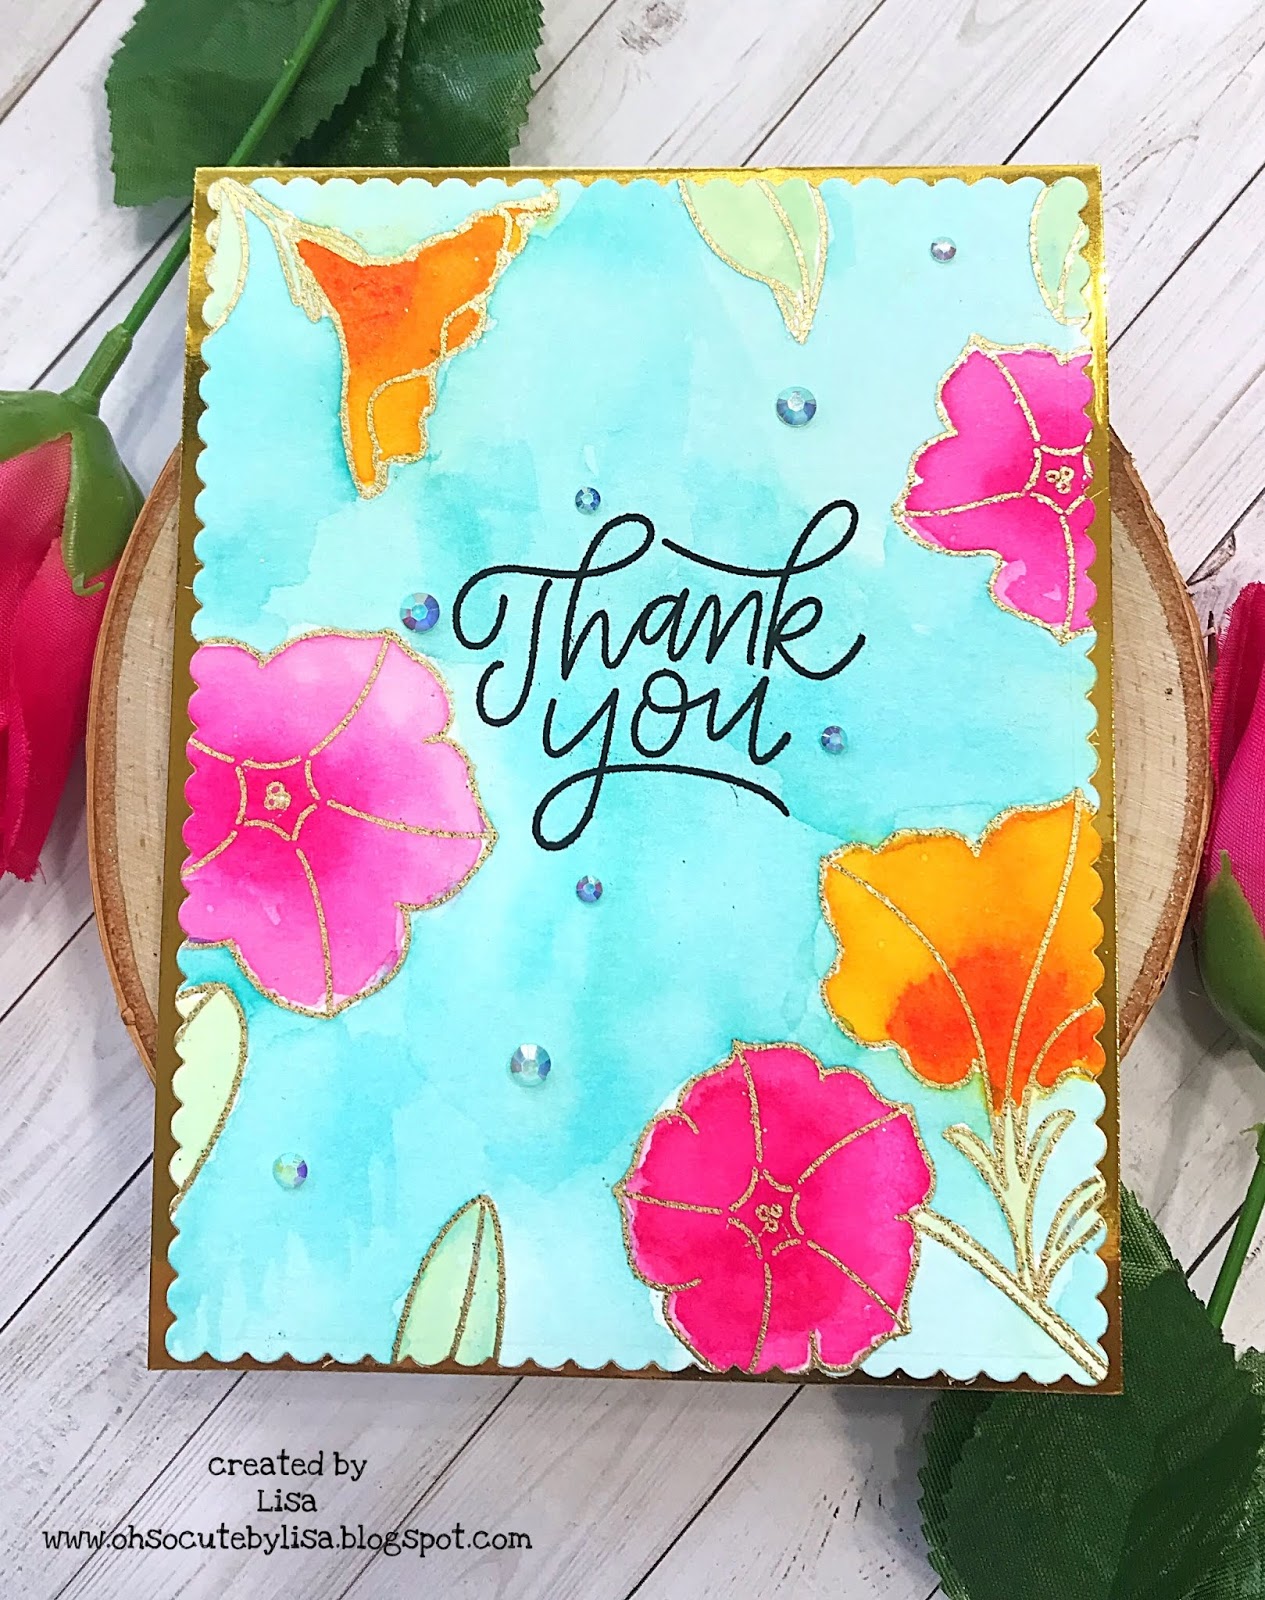
Watercoloring Over Gold Embossing


Hello crafty friends and welcome to my blog.
Today I have a beautiful card to share with you using two beautiful 
 Pretty Pink Posh stamps sets!
I absolutely love making floral cards and one of my favorite techniques
is watercoloring over gold embossing. I think it is such an elegant look!
Today I used the Pretty Petunias florals and the Everyday Greetings stamp sets
to make this beautiful garden inspired card.
Lately I've been crushing on this pink and orange combination.
I used 4 different color Distress Inks on this card:

I started off by stamping my flowers in Versamark Ink on to watercolor paper
It's hard to get a good impression on watercolor paper and the
MISTI helps with stamping over and over in the same spot!
I sprinkled WOW gold embossing powder over the Versamark and 
melted it with my heat gun.  The gold embossing makes it so easy to watercolor
and stay in the lines. After I watercolored the flowers and leaves I did a light wash
of Peacock Feathers all over the card around the flowers.
I took the Thank You sentiment from Everyday Greetings and stamped it in the
center of the floral panel in Versafine Black Onyx Ink.
I used the scalloped frame die from the My Favorite Things Blueprints 20
die set to cut out my floral panel and layered it on a gold foil background.
To finish off my card with some sparkle and shine I used some
Clear Sparkling Jewels from Pretty Pink Posh.

Here is a closeup of the card so you can see all the gold shimmer from
the embossing and the foil card stock.
I just love that gold shine!


I am also entering this card in the Simon Says Stamp Wednesday 
challenge this week.  The theme is No Designer Paper.
Instead of designer paper, I made my own background with pretty flowers.

Thanks for joining me today, I hope you enjoyed
my card and will come back soon for more crafty card
inspiration.  You can visit my IG and Facebook accounts
as well for many more cards!

Please note affiliate links have been used in this post.
 This means that I get a small commission at no additional cost to you when 
products are purchased through links that I share on my blog.

Also, if you do any shopping at Kat Scrappiness you can use my code 
LISA10 to save 10% on your order anytime!

Have a great day, I already am!
🌺Lisa 🌺


Tuesday, April 9, 2019

Hummingbird Love


Hello crafty friends and welcome to my blog.
Today I have a beautiful card to share with you using some 
sweet Pretty Pink Posh stamps and dies.
For my card I used the 
and the Love Shaker Die.

I started with a square card base made from white card stock
measuring 4" x 4". I then took the largest die from the Kat Scrappiness
Stitched Scalloped Square Dies and cut a panel out with white card stock.
The next step was to use the PPP Love Shaker Die and place it in the center
of the scalloped square die and run it through my Vagabond.
I also used the Love Shaker Die and cut out 4 more pieces
in white card stock so that I could layer those die cuts on top of each other.


Once I glued them all together I had a thick die cut
that was as thick as a chipboard element.
I took some watercolor paper and loosely painted some
Distress Inks in Picked Raspberry and Spiced Marmalade.
I trimmed down my watercolor panel to a heart shape to fit behind the 
Love Shaker panel. While I had my watercolor paper and inks
out, I stamped 2 hummingbirds in Gina K Amalgam ink 
and watercolored them with the same 2 distress inks from above.


After I glued my scalloped square on to my card base, I took 
my Love Shaker element with the watercolored piece behind it 
and glued it down to the base as well.
The hummingbirds were mounted with foam tape to the top
and bottom corners of the card.
To finish off the card I used PPP Sparkling Clear Jewels
to add some sparkle and shine.
For the last step I used my Spectrum Noir Clear Overlay Sparkle Pens
to add some glimmer to the hummingbirds and love die cut.


It's hard to catch the glimmer in a photograph but in real life
this card really does sparkle and shine!

Thanks for joining me today, I hope you enjoyed
my card and will come back soon for more crafty card
inspiration.  You can visit my IG and Facebook accounts
as well for many more cards!

Please note affiliate links have been used in this post.
 This means that I get a small commission at no additional cost to you when 
products are purchased through links that I share on my blog.

Also, if you do any shopping at Kat Scrappiness you can use my code 
LISA10 to save 10% on your order anytime!

Have a great day, I already am!
πŸ’“Lisa πŸ’“


Tuesday, October 30, 2018

Fall Leaves


Welcome to my blog crafty friends!!  
It's my turn today on the Kat Scrappiness blog and I have 
a sparkly card to share with you!  

The new Fall Crafters Essentials dies has a maple leaf shape in it that I am in love with! 
I'm not usually a fan of fall colors but I do love seeing these 
leaves in a variety of oranges and browns.

I wanted a pile of leaves that look like they just fell off the tree so I got out a variety of glitter paper in brown, orange and gold. The tree die is also from the Fall Crafters Essentials die set and it's perfect for all of your Fall cards and projects.
 I thought the sentiment from Happy Fall Y'all was so appropriate for this card, 
and it's true, you're never too old to play in the leaves!
I finished the card off with some clear jewels scattered around the sentiment for some extra shine!

Make sure to check out and follow the new Kat Scrappiness Fan Group Facebook page if you haven't already! You will find inspiration, sales and lots of other fun activities!
In other news, Kat Scrappiness is also hosting a blog hop in December to benefit a local charity called "The Coffee Oasis" and we would love for you to be a part of it!  You can get all the details here as well as linking up your blog or YouTube channel to join in!

Thanks so much for joining me today!
Don't forget to use code Lisa10 to save 10% on your order!

BUT.......

If you want to save 15% use code "CUSTOMERSROCK" through tomorrow!

Have a great day everyone, I already am!
🍁Lisa 🍁