Showing posts with label shaker card. Show all posts

Tuesday, November 16, 2021

Keep Calm and Put the Coffee on!


Hello Coffee Lovers! We are right in the middle of celebrating the Fall/Winter Coffee Loving Cardmaker's Blog Hop and today is day 5 of the hop! Be sure to check it out and see all of the generous Super Sponsor's and the prizes they are offering!

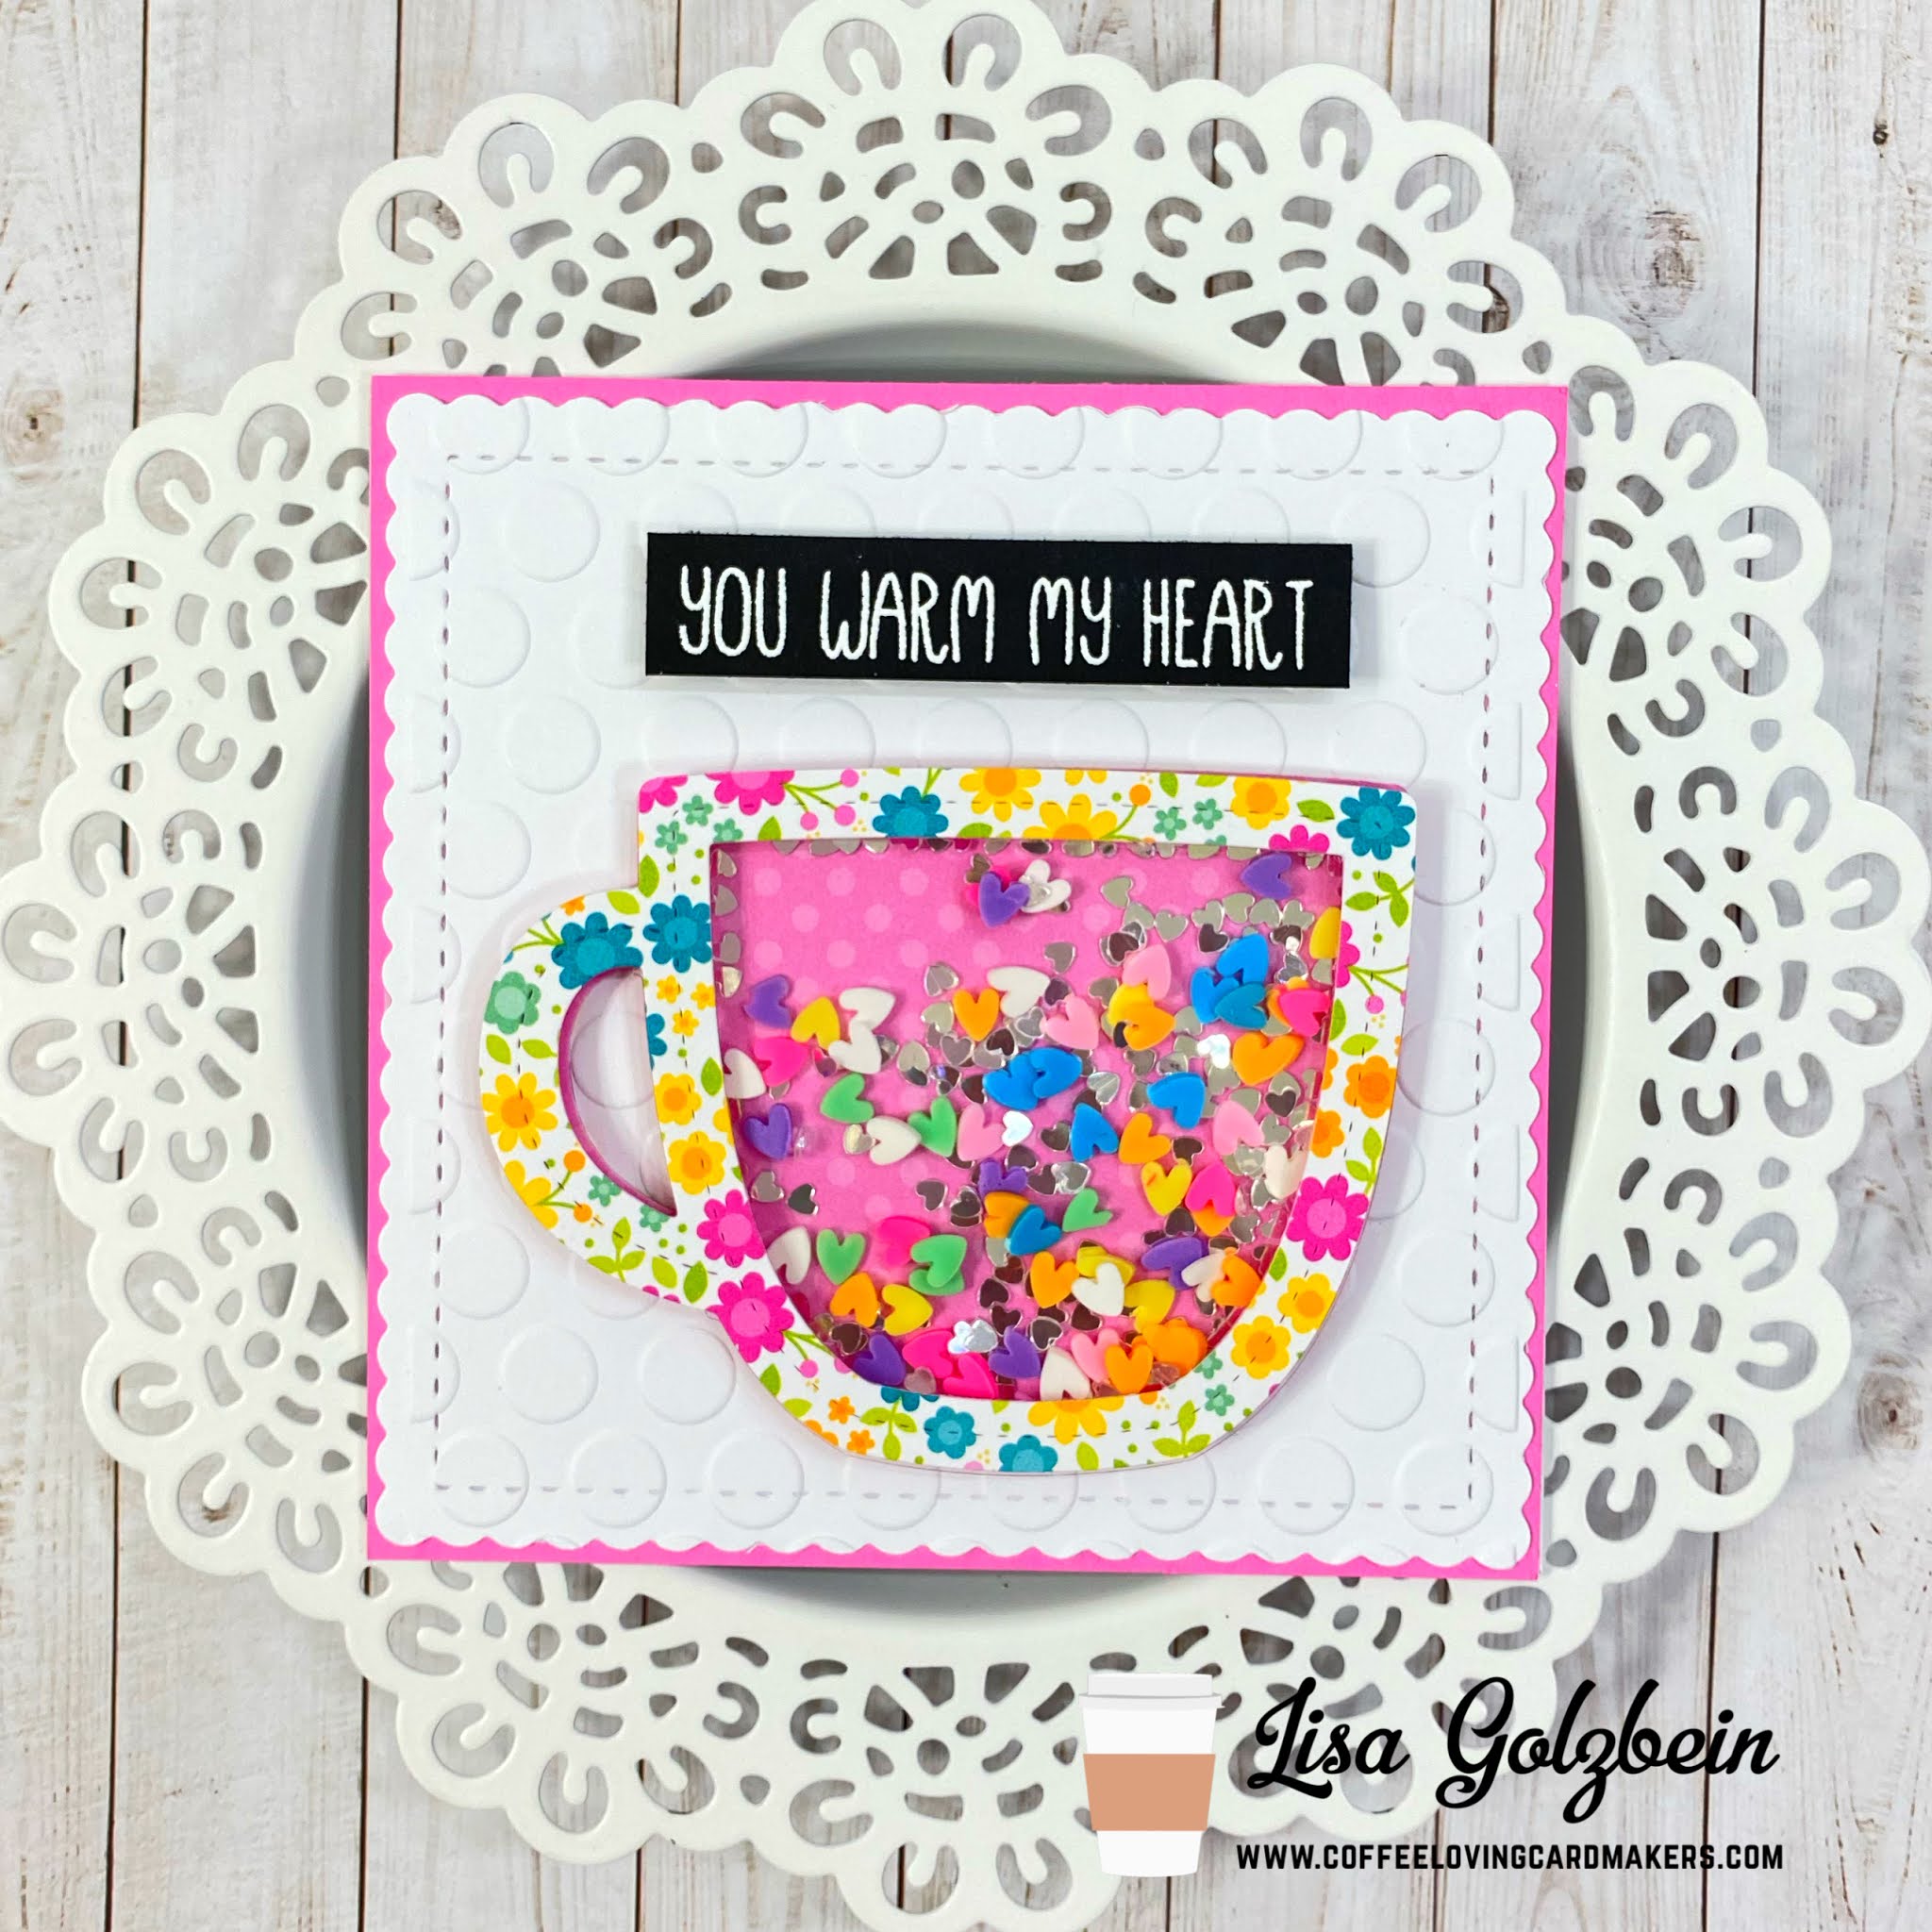
My card today features some adorable gnomes from Super Sponsor Whimsy Stamps! These coffee loving gnomes are just too cute! Whimsy Stamps has an entire line of gnome stamp sets and the cuties featured on my card are from the Gnomie Stamp Set. 


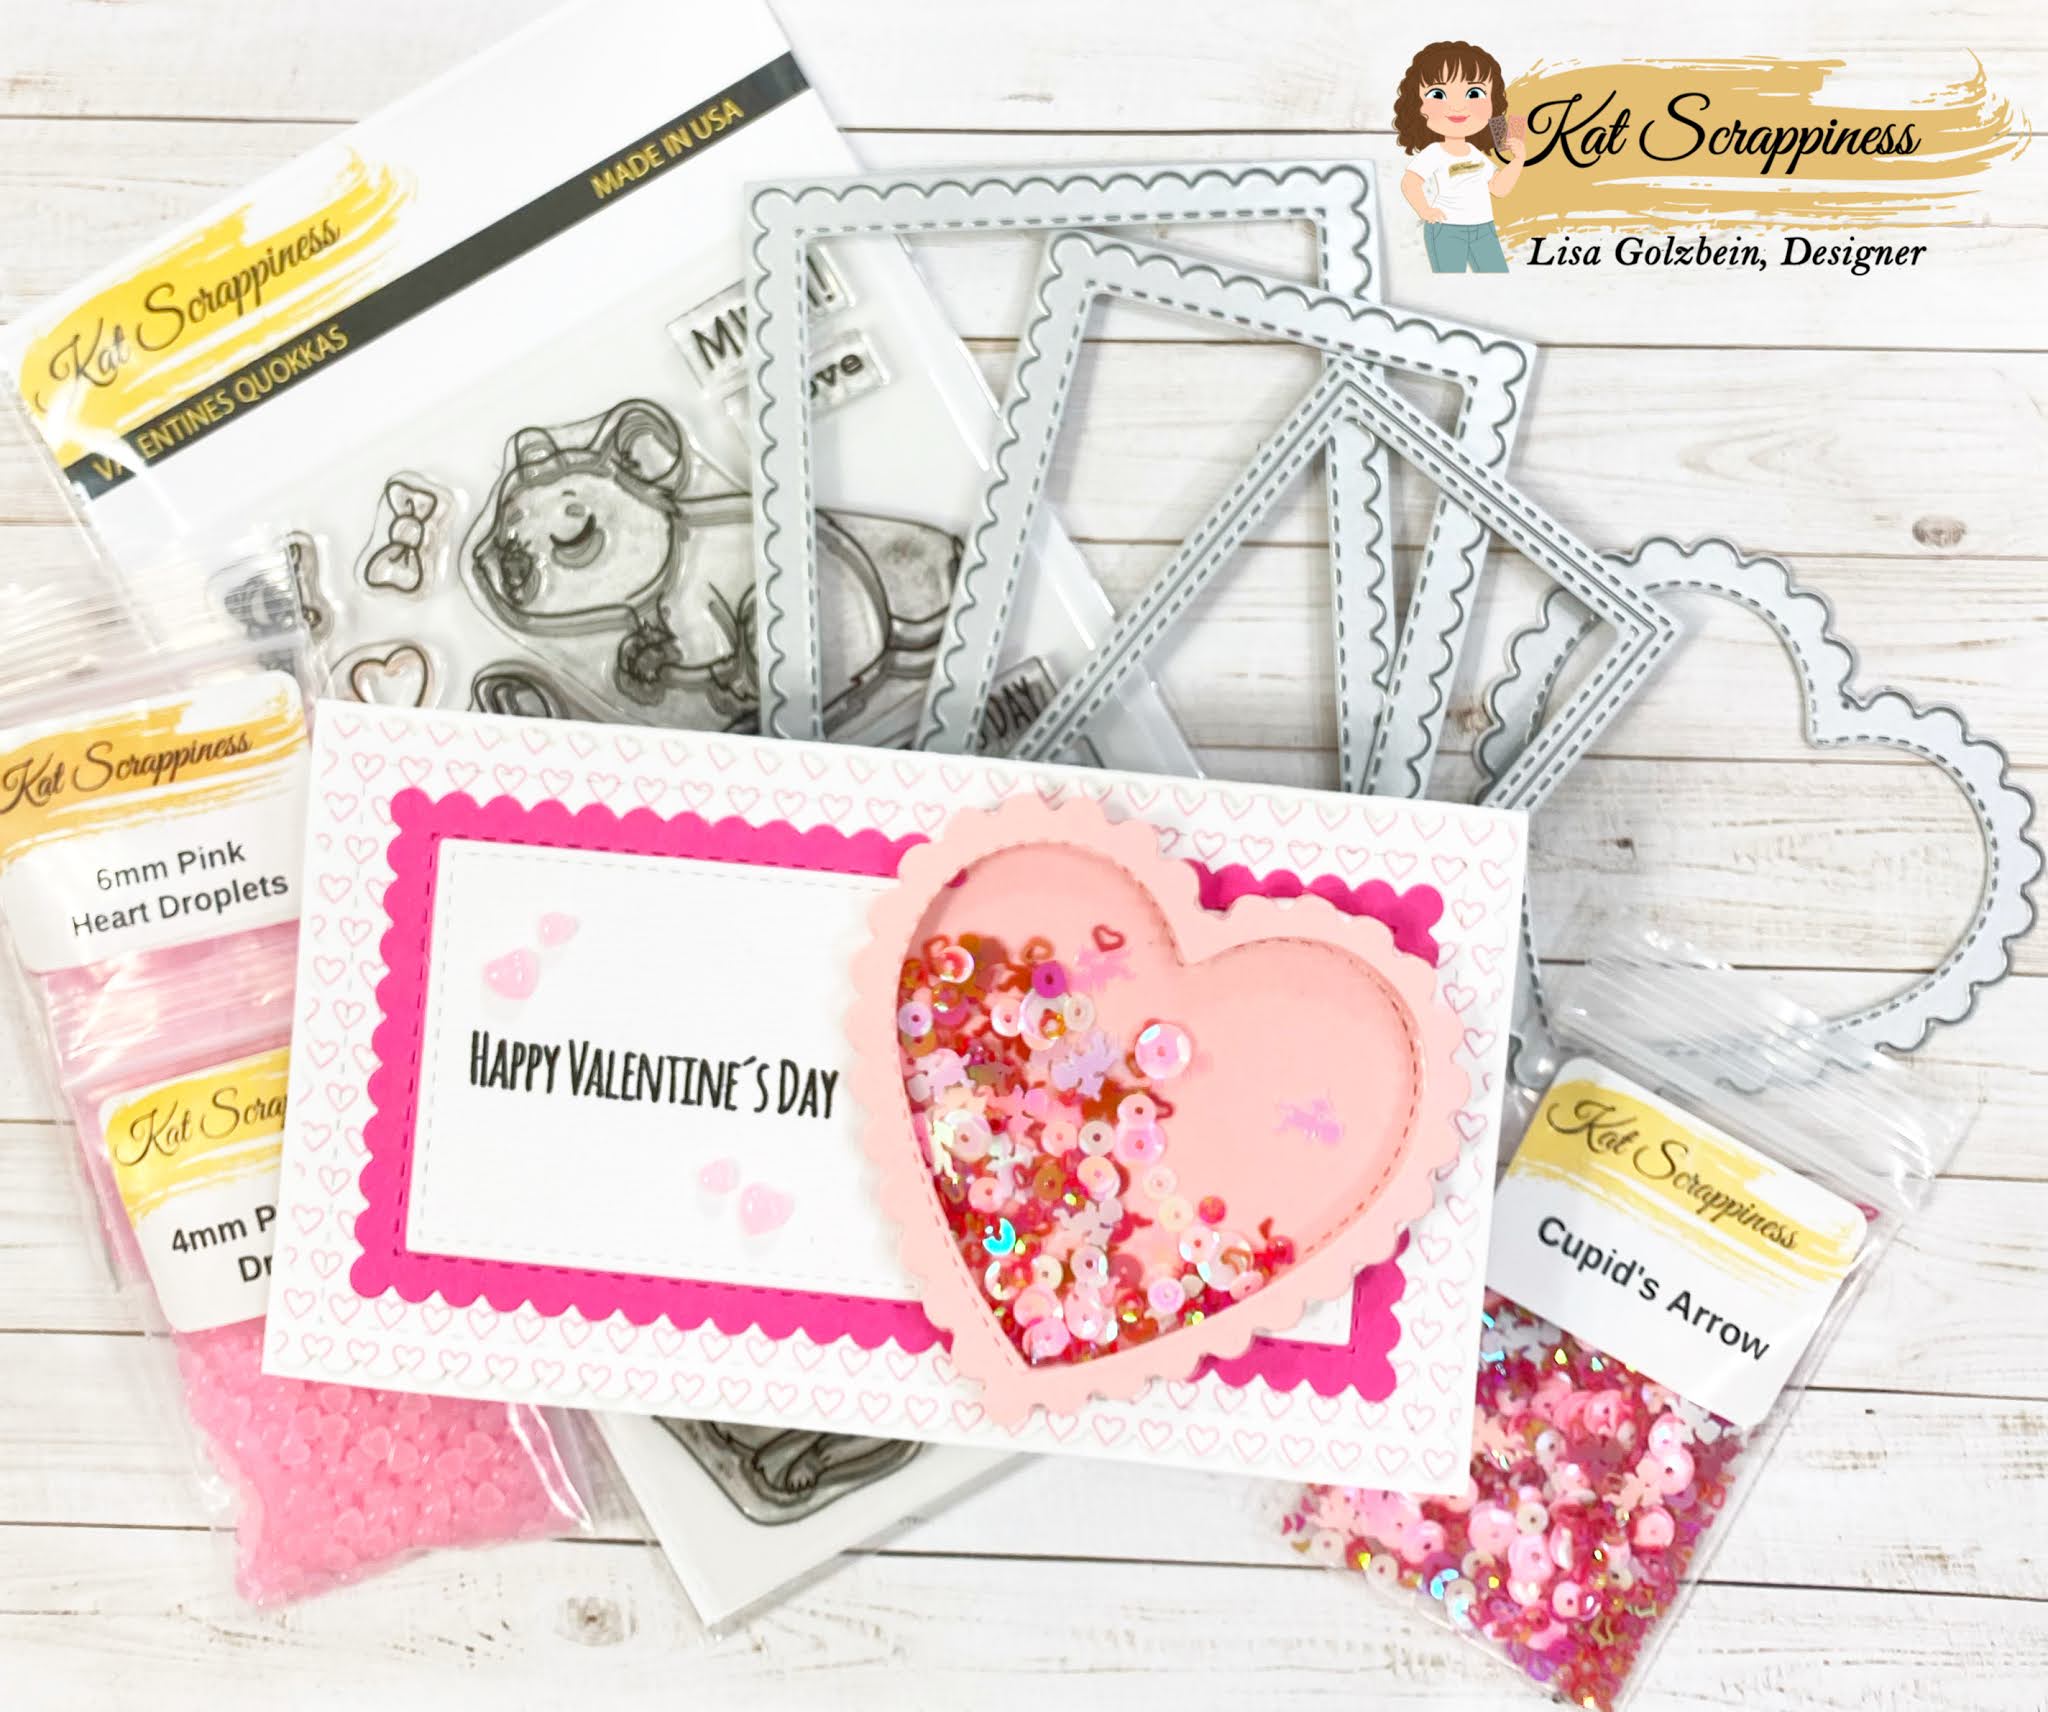
I turned this card into a slimline shaker card with 3 different windows! The sentiment in the middle is from another one of our Super Sponsors - Sweet and Sassy and it comes from their Coffee Talk 2 stamp set.  And last but not least is the darling little coffee cups from Super Sponsor Jaded Blossom.

This was a super fun card to make and even more fun to SHAKE!!

Make sure to visit the home page for the Coffee Lover's Hop, here is the link so you can link up your project and possibly win a prize from one of the generous Super Sponsors!


Thanks so much for stopping by today! Make sure to grab your favorite hot or cold beverage and hop along with us! You have until November 19th to join in the fun!

Have a great day, I already am!
☕️ Lisa ☕️

Friday, February 5, 2021

Mini Slimline Dies with a Heart Shaker


While most crafters love making Christmas cards, I actually love the crafty season that follows next!
Valentine's Day is my favorite crafty holiday! I've always loved hearts and pink and girly things ever since I was a little girl! The recent release at Kat Scrappiness brought with it the most awesome Mini Slimline Dies you've ever seen! There are so many different varieties which means there is something for everyone! My favorite of all of them is the Mini Stitched Scalloped Slimline Dies! Those dainty little scallops just make my heart go pitter patter! My second favorite Mini Slimline Die has to be the Mini Slimline Double Stitched Dies because it is the perfect layering dies for ALL the minis!

I used both of my favorite minis today for my shaker card.


For the shaker element on my card I used 2 different heart dies. The first is the Stitched Scalloped Heart Dies and the second is the Layering Nested Heart Dies. To make the shaker window I took the largest Stitched Scalloped Heart and I cut the middle out of it with the second largest Layered Heart Die. Once I had the scalloped frame I adhered a piece of acetate to that back of it that I cut out using one of the Layered Heart Dies.

The next step was to add foam tape to the back of the frame. A tip to help you mold foam tape around a specific shape easier is to remove the backing tape before you start to adhere it. Once I had the entire frame lined with foam tape it was time to pick out the fun shaker bits to go inside the window.
The back of the shaker heart is the largest Stitched Scalloped Heart  cut out and left whole.

For my Valentine's themed card I chose the adorable Cupid's Arrow Sequin Mix and I stamped my Happy Valentine's Day sentiment from the Valentine Quokka stamp set. I also used the beautiful Pink Heart Droplets around my sentiment in the 4mm and 6mm sizes.


This card was so much fun to make and probably because I used so many of my favorite Kat Scrappiness products! Head on over to the shop and check out all of the new Mini Slimline Dies, the new Quokka stamp set and the hundreds of adorable sequins and sprinkles!

Here is one more look at my card with all of the supplies used.


In addition to all of this Valentine goodness Kat Scrappiness has just released some more awesome new Valentine dies and they are ADORABLE!! They make shaker cards so easy and one of them even has peekaboo flaps! You can check them all out here!


Thanks so much for stopping by my blog today! If you love any of these products as much as I do than it would make me so happy if you clicked on any of my affiliate links throughout the post to purchase them and add them to your crafty collection!

Have a great day, I already am!

πŸ’“ Lisa πŸ’“

Tuesday, January 26, 2021

You Warm My Heart


Welcome back to my blog! Today I am up on the Coffee Loving Cardmaker's blog and I have a card to share with you using two adorable dies from Lawn Fawn. The Outside in Stitched Mug and the Stitched Mug Frame.  These 2 die make the most adorable shaker cards and I filled it with some colorful Rainbow Heart Sprinkles from Kat Scrappiness. The pretty floral paper is from a Doodlebug paper pack.


The square panel under the mug was cut from white card stock using the Stitched Scalloped Square Nesting Dies from Kat Scrappiness and embossed with a polka dot embossing folder.


The sentiment on my card is from the Honey Bee Stamps Perfect Blend stamp set. I stamped it in clear embossing ink on black paper and embossed it with Brutus Monroe Alabaster embossing powder.


I made sure to pop the mug and sentiment up on foam tape for some extra added dimension on my card!

I just love how this sweet card came out and I hope you do too!

Thanks for stopping by today and have a great day!

I already am!

 ☕️ Lisa  ☕️ 

Tuesday, November 24, 2020

Pre-Thanksgiving Advice!


Good morning! Today I am up on the Coffee Loving Cardmaker's blog with another caffeinated card to inspire you! 

In just 2 short days, Thanksgiving 2020 will be taking place and it will be the most memorable Thanksgiving of all time...... Or maybe the one we will all want to forget given the current climate.  
One thing is for sure, Thanksgiving means family and food and whether you are going to be seeing family this year or having a quiet Turkey day at home, make sure you have your beverage of choice and you relax and appreciate your family near or far!

With all the holiday hustle and bustle it is easy to get frustrated and have our patience tested so my card today is a reminder to drink your coffee (or beverage of choice) instead of saying bad words to strangers! πŸ˜‚πŸ˜‚πŸ˜‚πŸ˜‚πŸ˜‚πŸ˜‚πŸ˜‚


One of my favorite cards to make is a shaker card and every now and then I like to shake it up a little by making a square card.  I just love the symmetrical look they have. Today I thought it would be fun to use my favorite critter from The Rabbit Hole Designs caffeinated line, the Caffeinated Bee!
☕️ 🐝 ☕️ 🐝☕️ 🐝☕️ 🐝☕️ 🐝☕️ 🐝☕️ 🐝

I started out making this card by using the Heart Masking stencil from Taylored Expressions and blending 2 different Distress Oxide inks, Squeezed Lemonade and Fossilized Amber.
The next step was to take that hilarious sentiment from the CAS-ual Friday's stamp set titled 
"Hot Coffee Stamps".  Before I moved on the shaker portion of the card I added some fun black splatters to the card for a little more interest.

For the outside black frame of my card I used the Stitched Scalloped Square Nesting Dies from Kat Scrappiness. I cut the largest die from the set using black card stock and then I used the second largest die from the Double Stitched Square dies to cut a window out of it. I glued some acetate behind the window to complete the shaker portion and then I adhered foam tape to raise the panel up making room for my shaker bits. 
When I make a shaker card I like to sprinkle my bits on the base of my card and then position the top panel over the bits so I can properly center the panel on my card.  My shaker bits are all from Kat Scrappiness and consist of these 3 products:


I think it's a lot of fun to mix a concoction of shaker bits from different sets to make a fun mix for my shaker cards! The last step was to color that cute little bee with my Copic markers and adhere him to the front of my card. I love to used sparkly Stickles on the bees wings to really make them stand out!


I always enjoy a fun shaker card, I love the interactive nature of the card and they really give you the opportunity to customize your card to your liking.  Making the shaker bits mix is always a bit like being in the kitchen and making up a brand new recipe!
Here is a look at all the fun products I used to make my card.


Thanks so much for BUZZING by my ICU today! I sincerely hope that everyone has a safe and fun Thanksgiving no matter where you spend your day and no matter who you spend it with!

Have a great day, I already am!
 ☕️ 🐝  Lisa  ☕️ 🐝 

Sunday, July 26, 2020

Happy Mail


WHO DOESN'T LOVE HAPPY MAIL?!
I KNOW I DO!
πŸ’Œ πŸ’Œ πŸ’Œ πŸ’Œ πŸ’Œ πŸ’Œ πŸ’Œ πŸ’Œ πŸ’Œ πŸ’Œ πŸ’Œ


If you landed on my blog today, you probably enjoy papercrafts or cardmaking and  
I have a fun card to share with you today! 
It's my turn on the Kat Scrappiness blog today and I've created a fun shaker card that was inspired by 
a new embellishment in the Kat Scrappiness online craft store!

Take a look at these adorable little Happy Mail Sprinkles!


From the minute I got my hands on these little cuties I knew I wanted to make a card that had a mailbox on it with a shaker window for these little envelopes and here it is!


I just love how this card came out and it was super easy to create!

Since I don't own a specific mailbox die I figured out a way to make my own mailbox and I'm going to show you how I did it today!


For my mailbox I started with the Pretty Pink Posh Stitched Duo 3 Tag Die. The top part of it is shaped like the top of a mailbox so I took the smallest die in the Kat Scrappiness Double Stitched Square Dies and cut out a notch in the bottom of the tag die.

The remaining shape looked just like a mailbox. 

I then took the smallest die from the Double Stitched Square Dies again and cut a window out of the lower part of the tag so I could create a shaker window. 

Once I had the window cut out I took a sheet of Kat Scrappiness A2 Acetate Sheets  and cut out a small enough piece to cover the back side of that small square window. 


To make the half circle on top of the mailbox I used the smallest die from the Double Stitched Circle Dies and cut it in half creating a half circle where I could stamp my sentiment from the Simon Says Stamp Envelops Sentiments Stamp Set. I added one envelope and one heart from the Happy Mail Sprinkles and the Red Heart Sprinkles on either side of the sentiment. 

Here is a picture collage tutorial step by step of how I created the mailbox with the shaker window and half circle for my sentiment.


I used foam tape to build up the area around the window so it would hold my shaker bits.

The next step was to prepare the base of my card to adhere the shaker mailbox to.  The Stitched Postage Stamp Edge Rectangle Nesting Dies are the perfect dies to create fun background panels for your cards.  I used the largest die from that set, cut out some white cardstock and did some fun stenciling using the Taylored Expressions Puppy Love stencil! I just love how the cute little red hearts looked all over the background.

Once the background was ready I tied some red and white twine around the top and adhered it to a blue card base to match my mailbox.

Next I sprinkled some of the Happy Mail Sprinkles and the Red Heart Sprinkles into the middle of the stenciled panel. I then removed the backing from all the foam tape behind the mailbox and centered the window over the cute sprinkles. I actually angled the mailbox just because I thought it gave it a fun random look.


I loved the little envelopes SO much I added a bunch more of them around the card in between the stenciled hearts.

It was a lot of fun to make my own mailbox. Just because you don't have a specific die sometimes doesn't mean you can't shop your die collection and make something unique!


Thank you so much for joining me on my blog today! I hope you'll check out all of the great crafty products over at Kat Scrappiness! There are literally hundreds of embellishments to create the most unique and fun shaker cards like mine! There are sequins, sprinkles, jewels, coffee beans and so much more!

That's all for today, don't forget to follow 
social media platforms to be alerted to new releases, sales and giveaways!


Have a great day, I already am!
πŸ’Œ  Lisa  πŸ’Œ

Friday, June 26, 2020

Look For Rainbows


Hi and welcome back to my blog. Today I have a fun rainbow card to share with all of you using lots of goodies from Kat Scrappiness!

Rainbows and shakers are two of my favorite things so I love to create them any chance I get. 

I started out by using a raindrop stencil from my stash that is similar to the Newton's Nook Raindrops Stencil. For my inks I love to use the Atelier Inks from Inkon 3 because they blend so smoothly and the colors are so vibrant! I used a piece of Bristol Smooth card stock and a mini blending tool and then I ink blended in rainbow order over the raindrops using these ink colors:


Once I had the ink blending done I took my panel and cut out a smaller panel using the largest die from the Stitched Postage Stamp Edge Rectangle Dies from Kat's store
Next I took the smaller cloud die from the He Is Risen Dies and I placed it in 3 different places on the raindrop panel and cut it out so I could make 3 different shaker wells on the front of my card.
I turned the panel over and covered it with a piece of acetate making sure to cover the open cloud areas. To pop the panel up and create the shaker wells, I used foam tape to section off the clouds and pop the whole panel up. Now the fun part! I filled all 3 shaker wells with some fun Rainbow Bright Sprinkles! I covered the backs of the clouds with white card stock and then matted the whole panel on to a purple panel measuring 4 1/4" x 5 1/2". 
I then placed the finished panel on to a white card base.

For the sentiment I used Versafine Black Onyx ink and the Rainbow stamp set by Taylored Expressions and it fit so perfectly with the theme of the card. I also used some Sparkling Clear Droplets around the finished card to add some extra shine!
For one extra fun added element I used the Rainbow made of polymer clay that is included in the 
Teal Kawaii Cloud Sprinkles. What a fun element to add to any card!


This card is just all full of color and whimsy and I love how it turned out! 
Kat Scrappiness is definitely your go to shop for all things shaker related!
There are literally hundreds of different sequins and sprinkles in stock to fit any theme card or any style card you can dream of! From food to animals to jewels, Kat has you covered!

Don't forget to follow Kat Scrappiness on all
social media platforms to be alerted to new releases, sales and giveaways!


Thank you so much for stopping by my blog today!
Have a wonderful day, I already am!
🌈  Lisa  🌈 


Disclaimer: My blog uses affiliate links 
whenever possible at no additional cost to you.
I only promote products I actually use and think 
other crafters would like as well!

Wednesday, April 29, 2020

The Rabbit Hole Designs May Release Inspiration Hop ~ Day 3


Hello and how did you enjoy the adorable Terrier stamp set 
The Rabbit Hole Designs had for you yesterday?
Today we have a brand new stencil to share with you and it is so much fun! It is called the Broken Glass stencil and 
and here is a look at it:


I made a shaker card using the new stencil.
For my background and I used a fun technique with Distress Oxide Inks and watercolor paper. I started by doing some ink blending with 3 different colors of ink on to some smooth card stock and I made sure to apply the ink heavily.  Once I was done, I removed the stencil and sprayed it with water heavily until there was visible beads of water all over the stencil with the ink still on there. Next I laid my watercolor paper on to the stencil while it was still wet to pick up all the wet ink that was left and the result was this beautiful soft pattern of the stencil.  I just love how this turned out and I knew it needed a beautiful sentiment to match.  I used a sentiment from the Fearless stamp set and I thought it went perfectly.  I decided to maker it a shaker card so I cut a circle out of the stenciled pattern and stamped the sentiment under it on the card base.  I put some acetate behind the circle and laid some fun Rabbit Hole sequins on the card base.


Lastly I popped the stenciled panel up on foam tape and applied it to the card front.  For a little extra feminine touch I added some twine and a rose to the top of the card. I really love how this card turned out! Here is another look at this beauty!


Make sure you hop around to the other DT member's blog to see how they used the new Broken Glass stencil on their cards! 

Jenn
Kelly
Tangii
Alison
Amanda
Lisa (you are here)


GIVEAWAY

To celebrate the next three days of release, The Rabbit Hole Designs is giving away two gift certificates; one to a lucky Instagram Follower and one to a lucky Fan Page follower. Winner will be chosen at random from the comments left on the INSTAGRAM post, and tagging friends, and also from commenting on the Fan Page post. So make sure to head on over to INSTAGRAM and look for the giveaway post @therabbitholedesignsllc and look for the post at The Rabbit Hole Designs Fan Page by 11:59 p.m. PST 04-30-2020. Winner will be announced on The Rabbit Hole Designs blog 05-01-2020.


Don't forget to visit Simon Says Stamp as well where you can find The Rabbit Hole Designs products as well!

Thank you so much for stopping by my blog today!

For more inspiration, updates, and news make sure to check out these places ...


Have a great day, I already am!
🌺 Lisa  🌺

Monday, January 20, 2020

I'm a-MAZE-d by You!


Good morning, today I'd like to share with you a few more projects I made using 
some of the brand new products from i-Crafter!
It's been an exciting weekend at Creativation and I'm headed home today inspired by everything I've seen! i-Crafter made their big debut at Creativation and aside from their awesome stamps and dies, they are coming out with some great inks and tools as well!

One of the dies that I am particularly smitten with is the Heart Maze Dies.


With Valentine's Day right around the corner you'll just love creating all sorts of cards with these dies! Aside from the adorable maze die there is a cute lock and key die as well. I created a shaker card with the maze die and I filled it with fun seed beads so they would roll around easily inside the maze.  


Make sure you check out the i-Crafter website for a lot more inspirational stamps and dies! You can also check out the stamp set that goes along with the Heart Maze Dies, it's called Amaze Me and it features a neat little maze stamp and 2 fun sentiments.

Thanks for stopping by today and I hope you have a crafty day!
Have a great day, I already am!
❤️ Lisa ❤️


Saturday, December 28, 2019

Two For One Donut Day

Welcome back to my blog Rabbit Hole fans, I hope everyone enjoyed 
their holidays with friends and family!

Today I have a special treat, two donut cards for the price of one. 
I just love the sentiments from the 
More Than Donuts stamp set and I used them to create the 2 cards
I am sharing today. 


For my first card I made a miniature note card.
I started with an 8x4 inch piece of kraft colored card stock and folded
it in half at 4 inches. I covered the bottom half of the front panel
in pink patterned paper and after I adhered it, I rounded the corners of the 
bottom of the front panel.  I then took the heart stamp from the 
Sassy Sentiments - Anti Valentine stamp set and stamped it randomly 
in kraft ink so it would give a tone on tone appearance to the top of the front panel.

I assembled a few cute donuts from my stash to the top of the patterned paper
and stamped my sentiment from More Than Donuts onto a cute tag.

A little pink twine to finish off the top of the card and it was done.
Why are donuts always soooooo darn cute?
🍩🍩🍩


My second card today is a gate fold card with a shaker element on the front.
The shaker element on the front is filled with fun sprinkles
just like you'd see on a donut.
I only adhered the heart shaker to one side of the front panel so
it could be opened to reveal the cute sentiment with donuts
on the inside.
I used 2 more sentiments from the More Than Donuts 
stamp set for this card. 


Here are the 2 stamp sets I used on today's cards:


Thanks so much for stopping by the blog today, I hope
you enjoyed my 2 donut inspired cards.

Make sure to check back in just 2 short days to see all
of the awesome new products included in the new release!
We will be sharing inspiration and as always there will be a chance
to win prizes during the blog hop.

Have a great day, I already am!
🍩 Lisa  πŸ©


Saturday, December 14, 2019

Love and Hope

Hello and welcome to my blog! 
Today I'm up on The Rabbit Hole Designs blog and I have 2 cards
for you using the Put a Bow on It stamp set that was recently released.

This stamp set is so elegant and can be used in so many different ways!
For the release I colored it up, cut it out and used it as a focal point
on the front of a gate fold card with a shutter mechanism on the inside.


On today's cards I decided to stamp directly on to my card and 
heat emboss the images in gold.


For the first card I stamped the bow image and "Love" sentiment multiple times 
randomly all over a white card stock panel cut to 5 1/2" x 4 1/4" with 
Ranger Watermark Resist Ink. I love this ink as it gives a clean and crisp
impression every time and is super sticky.
Next I sprinkled WOW Gold Embossing Powder all over
the stamped images and hit them with my heat gun.
I love watching the transformation of gold powder when it melts,
it's truly magical and I never get tired of seeing it.
The next step was to die cut the largest rectangle from the 
Kat Scrappiness Stitched Scalloped Rectangle dies from gold glitter paper.
I adhered the scalloped rectangle to the embossed panel and since it 
was slightly smaller, it allowed some of the images to peek out around
the edges.  I love that look.


For the second card I repeated the steps of stamping the bow randomly over
the white card stock and heat embossing with gold but this time
I decided to a bit of watercoloring inside of the bows with some pretty pinks. 
Once the bows were colored I stamped the sentiment "Hope" 
from the Put a Bow on It stamp set in pink ink.
I once again used the largest rectangle from the Kat Scrappiness 
Stitched Scalloped Rectangle dies but this time from pink glitter paper.
I backed the rectangle with acetate so I could create a shaker card this time.
I included some pink sequins from The Rabbit Hole Designs Fearless Bundle
as well as a mix of sequins from the Kat Scrappiness sequin shop.

I'm loving how these two cards came out and I love how versatile
the Put a Bow on It stamp set is.

Thanks so much for stopping by today.
Have a great day, I already am!
πŸ’˜Lisa πŸ’˜