Wednesday, May 30, 2018

Mini Treat Bags

Hello again crafty friends!  I'm back today on the Kat Scrappiness blog to bring you another cute project!  I made 3 adorable mini treat bags using the Stitched Heart Tag die and I decorated them with the Stitched Flag dies and the Double Stitched Circle dies.  I have a video for you today to show how I assembled the bags and it's super easy to follow.  I have to thank my fellow Kat Scrappiness design team member Maria Russell for the fabulous idea to make the bag.  She did a video a while back showing the process and I remade the bags using some current stamps and dies.  

This is the bag I assembled in my video and I used a sentiment from the Punny Snacks stamp set.  
The pretty patterned paper is from the Lawn Fawn paper pack, Gotta Have Gingham .  I started with 2 die cut panels from the larger die in the Stitch Heart Tag dies. I then cut a coordinating piece of paper to 11 7/8" x 2" to attach the 2 die cut panels together.  Next you will score your paper on the 11 7/8" side at 4" and 7 7/8" and then you will score the paper 1/4" in from both sides on the 2" side.


After you score your strip fold on all the score lines and make 
4 snips where the score lines meet each other.


The next step is to place some strong double sided adhesive along the middle sections to 
adhere the 2 heart tags.

Next you want to apply some additional double sided tape to the remaining scored flaps and assemble the box accordingly.


The video will show the assembly process step by step.  The only thing left to do is decorate the front of the box and fill it with pretty tissue paper and treats!
I die cut several Stitched Flag dies from some more gingham paper and arranged them around one of the Double Stitched Circle dies.  I stamped a sentiment from the Punny Snacks stamp set on to a scalloped circle and adhered it to the circle on some foam tape.  
I made the same box with some different patterned paper but essentially followed the same steps.

I also created the same bag a third time for the Coffee Lovers Bloghop that Kat Scrappiness is a super sponsor for.  I used the Layered Coffee Cup die and the "Got Coffee" sentiment die for the front of the bag and I finished it off with a sentiment from the Technique Tuesday stamp set "Sassy Coffee"
I stamped the sentiment on to a Stitched Flag die and finished off the front panel with some paint splatters of Ground Espresso distress ink.

These treat bags are super fun to make and they are very quick and easy to assemble.  They would make great party favors for a kids party or even elegant favors for a wedding or anniversary party.  
Here is a link to the YouTube video showing how to assemble these cute bags.


Thanks for joining me today!  All supplies used are linked below.  
I hope you'll give this technique a try!
Don't forget to use code Lisa10 at KatScrappiness.com to receive 10% off your order at checkout.
Have a great day, I already am!
๐ŸฌLisa ๐Ÿฌ


Friday, May 25, 2018

Spring & Summer Coffee Lovers Bloghop


Hello Crafty Coffee Lovers!
Kat Scrappiness is hopping along today as a super sponsor with the 
The best part about this hop is that you don't have to love coffee to participate!  You just have to love sharing in all of the crafty coffee fun!  I personally do love a good cup of coffee especially at work and I am definitely an iced coffee lover!  If you use coupon code ILOVECOFFEE between 5/25 and 6/1 you will receive 10% off your order in the Kat Scrappiness shop.
Also Kat is giving away two $25 gift cards to the store and a flash prize of a Layered Coffee Cup Die and a "got coffee" sentiment die.


Kat Scrappiness released two awesome coffee themed dies recently and they are so much fun to create with.  The first is a layered coffee cup die and the second is a "got coffee" sentiment die.
Here are the pictures of the two dies:
,

I had fun with these 2 dies and I created 1 gift bag and 3 cards with them.  
The first project is the mini gift bag that I assembled using the 
Kat Scrappiness Stitched Heart Tags Die.  Thank you to Maria Russell for making a video showing how to make a mini gift bag from these dies.  I decorated the front of the card using the 2 coffee dies 
and splattered the aqua heart tag with some Ground Espresso Distress Ink.  The stamped sentiment is from Technique Tuesday's Sassy Coffee stamp set and it is stamped onto a Stitched Flag Die that is new in the KS shop this month.

The next 2 cards feature the Layered Coffee Cup Die again with some fun colorful effects!  The first card below with the pink cup was made using a pearlescent pink watercolor from the Kuretake Gansai Tambi pearl color set.  It really stands out against the embossed background.  I stamped a heart from the Swatches stamp set and heat embossed it in gold on the white cozy. I die cut the "coffee" word from the "got coffee" sentiment 3 times in 3 different colors to repeat down the side of the card.  I finished off the card with some sparkly sequins from Kat's shop.
The second card has a distressed coffee stained background that I achieved by smooshing some Ground Espresso ink onto a piece of acetate and then spraying with water.  I then smooshed the acetate against the cream colored paper to give the distressed coffee colored look.  I love that effect!  I stamped the star from the Swatches stamp set onto the cozy and then sent it through the paper crimper to give it a realistic look.  Same die but two very different looks!


The last card I want to share with you is perfect for the Spring/Summer theme.  It features a very colorful tropical setting with the cutest little Denami hula chickie on the front! I decorated the cup and the cozy with some flowers from My Favorite Things and the grass die is from Lawn Fawn.  The super cute clouds are from Paper Smooches and the bright sun is from My Creative Time. I love how bright and cheery this card turned out and the Kat Scrappiness Layered Coffee Cup Die is the perfect large focal point!

Thanks again for hopping along with Kat Scrappiness today in the Spring and Summer Coffee Lovers Bloghop.  Make sure to check out all of the fun projects from all of the other talented designers today!  Don't forget to use code ILOVECOFFEE to save 10% in the Kat Scrappiness shop from 
5/25-6/1.  There is a very large selection of all things crafty in Kat's shop!
Have a fabulous day!
I already am!
☕️Lisa ☕️


Saturday, May 12, 2018

Mother's and Father's Day Cards

Hello crafty friends!
I'm on the Kat Scrappiness blog today to share two cards with you that I made with the same supplies but with 2 very different looks.  It's always nice to make 2 cards at the same time especially at this time of the year when Mother's Day and Father's Day are so close together.
The new Stitched Flags dies in the shop this month when paired with the Upper and Lower Condensed Alpha Dies allow for some very versatile combinations of cards.

The first card is a masculine card that could be used for Father's Day or Birthday.  I decorated the Stitched Flags with the Everyday Brush Strokes stamp set from last month's release.  I cut out the letters D-A-D with the Condensed Uppercase Alphas and gave them a confetti like appearance with some polka dots at the bottom of the letters in blue and brown.  I die cut the kraft panel with a Wonky Wavy Stitched Rectangle die and then embossed it with a woodgrain embossing folder.  Lots of foam tape to pop up the flags and the letters.  I just love the added dimension!

My second card is just a feminine version of the first card.  It's amazing when you change the color palette and the stamp set what a different look you can achieve.  The Fab Flowers stamp set from Lawn Fawn and the pink palette make this the perfect Mother's Day card
or a sweet Birthday card for Mom.

Thank you so much for stopping by today, I hope I've inspired you to look at your dies and stamp sets in a new light to see what combinations you could come up with!
Don't forget to use code Lisa10 at checkout in the Kat Scrappiness shop to get a discount
on all your crafty goodies!

Have a great day!
I already am!
๐Ÿ‘ฉ๐ŸผLisa ๐Ÿ‘ฆ๐Ÿผ

Monday, May 7, 2018

Get Creative Challenge - #69


Hi everyone!  I'm so excited to be joining Angie and the rest of the talented design team 
over at the Get Creative Challenge blog.  Big thanks to Angie for asking me to join the team!
  

The Pink team is using digi images from 3 sponsors this month. Knitty Kitty, QKR Stampede and Wink Wink Ink. This is challenge #69 with a theme of Lots of Flowers.  On my card I used the adorable Poodle image from Wink Wink Ink.  I printed the darling Poodle out and die cut a Kat Scrappiness Stitched Fancy Scalloped Square around her.  I stamped the sentiment from a My Creative Time stamp set called Loyal Friends.  I used a new cardstock color from Papertrey Ink called Weathervane for the card base and finished off the card with some gray twine from Lawn Fawn. For a little pop of color I added a small red glittered heart to the sweet Poodle.  

Make sure to visit the other Design Team members blogs and see the beautiful cards they've created! Please remember you have all month to play along.
See challenge blog for official rules and have fun!
Thanks for stopping by and have a great day, I already am!
๐ŸถLisa ๐Ÿถ


Sunday, May 6, 2018

Angies Digital Stamps May Challenge

Welcome back to another monthly challenge over at Angies Digital Stamps. This week I  chose to play with this adorable VW Beetle image from Angies shop.  It paired so well with this cute sentiment from a Taylored Expressions stamp set I had.  I colored the cute little bug with some copic markers and sponged some broken china distress ink over a SSS raindrops stencil.  I added some adorable clouds from Papertrey Ink and popped them up over the raindrops.  
This month is challenge #20 and it runs from 5/6 - 5/25
 and the theme is Anything goes : No Twist.
Make sure to visit the other Design Team members blogs and see the beautiful cards they've created! Please remember you have all month to play along.
See challenge blog for official rules and have fun!
Thanks for stopping by and have a great day, I already am!
๐Ÿš˜Lisa ๐Ÿš˜

Saturday, May 5, 2018

Masculine Cards with Dad's Tools

I'm up today on the Kat Scrappiness blog to bring you some Father's Day/Masculine card inspiration.  If you're anything like me, masculine cards can be difficult.  I know for me, most of my projects involve the color pink and lots of sparkle and shine.  Up until now masculine cards have been a chore because I'm not inspired by the color schemes or the focal points.  This month there is a new stamp set in the Kat Scrappiness store that has breathed new life into the masculine card world.  Step aside feminine layering stamps because Dad's Tools are making their debut!  


The new Dad's Tools stamp set at KS gives a fresh new look to dad's old toolbox.  There are 4 different elements in the stamp set to layer and decorate with.  There is a hammer, a screwdriver, a nail and a screw and so many fun sentiments to play with.  
I found it helpful to swatch some gray and brown colors before I started my card to see what combinations would look best when I started stamping the layers of my tools.  I used the heart stamp from the Swatches  stamp set to make this visual tool and it was quite helpful.  With layering stamps you want to start out with your lightest color ink and add progressively darker layers as you go.


For my first card today I decided to recreate a fun toolbox and fill it up with some of Dad's Tools.  


I cut down a standard A2 card base into the shape of a toolbox and gave it a front panel which doubled as a pocket so I could fit the hammer, screwdriver and some nails and screws into it. The white embossed sentiment "Happy Birthday" fit perfectly onto one of the Stitched Fishtail Banner Dies which is also one of the new releases this month in the Kat Scrappiness store. 


I layered the sentiment onto a second darker fishtail banner and added the 
"Mr. Fix It" sentiment under the banners.  

For my second card today I went with a more traditional card and I used only the hammer and screwdriver from Dad's Tools for the focal point under the sentiment.

I used patterned paper for my first layer and a faux pegboard piece of paper for my second layer.  I cut both of those layers out with two different size dies from the Wonky Wavy Stitched Rectangles dies to give some added interest to the borders.  For the focal point of the card I used another one of the new releases this month called Stitched Flags.  


The shape of these new dies is so unique and can be used alone or with a sentiment for a fun element on your cards.  I stamped the sentiment "Happy Father's Day" from Dad's Tools in Versamark ink and white heat embossed it onto one of the Stitched Flags.  I mounted the Flag onto some foam tape for some extra added dimension.

Make sure to check out what the other girls on the design team have done this month with the Stitched Flag dies!  There is so much talent and creativity, you will definitely want to add these dies to your collection!

Also today is National Scrapbooking Day!  We are having some fun giveaways at Kat Scrappiness and from May 4th - 6th there will be 20% off sitewide if you use coupon code NSD2018.


Thank you so much for joining me today here on the blog!  Don't forget to use code Lisa10 when checking out for 10% off your order!

Have a wonderful day, I already am!
๐Ÿ”จLisa ๐Ÿ”จ

Tuesday, May 1, 2018

CAS(E) this sketch #269


Back again for another CAS(E) this sketch.  Loving the new release at Kat Scrappiness.  The new Stitched Flag Dies are so versatile with such a unique shape.  They look great with a pretty Fab Flower from Lawn Fawn.  I embossed the pink panel with a heart embossing folder and then die cut the panel with a Wonky Wavy Stitched rectangle die from Kat Scrappiness as well.  For a bold focal point I die cut the letters M-O-M from the Condensed Lowercase Alpha dies and then I dotted them with pink and gray ink using the bottom tip of a small paintbrush.  It looks like confetti falling on the letters.  Lots of foam tape to pop up the flags and the letters.  Love the added dimension!  Some cards take so long to make but when I have a sketch to work with it goes so much faster.  I probably put this card together in 15 minutes.
Thanks for stopping by today!
Have fun crafting, I definitely am!
๐ŸŒธLisa ๐ŸŒธ

Monday, April 30, 2018

Crafty Friends are the Best Friends!

Hello Crafty Friends!
I'm up on the Kat Scrappiness blog today and it's time to get CRAFTY!๐ŸŽจ๐Ÿ–Œ
Chances are if you're reading this post you are a crafty person and chances are you have one or more crafty friends!  Today I have 2 cards to share with you that are perfect to send to the crafty friends in your life!  Both cards use the new Kat Scrappiness word die "Hello My Crafty Friend".  This is such a fun die because it can be used as a large focal point on it's own or you can use any of the 4 words in the set on their own like I did on the second card.  

For my first card I used a technique that I love called inlaid die cutting.  I took some smooth white card stock and I blended 6 different Distress inks in a rainbow of color large enough to die cut the Crafty Friends die out of.  The Distress inks I used were a combination of the original colors and the newer Distress oxide pads.  In rainbow order the were:
Picked Raspberry
Carved Pumpkin
Squeezed Lemonade
Cracked Pistachio
Salty Ocean
Wilted Violet

After I got the colors just the way I wanted I splattered the paper with water to give it a distressed look and then I die cut the entire saying out of the rainbow background and then again out of a black panel measuring 5 1/4" x 4".  I then took a standard white A2 card base and put adhesive all over the front before laying down the black panel.  Next I laid the rainbow colored sentiment back into the open spots on the black panel and fit them in like a jigsaw puzzle.  They fit perfectly in the openings and it didn't add any bulk to the card.  I saved the little black bits to place back in the openings in the letters with holes in them.  Putting the black bits back in gives it a very uniform look.


To finish the card off I added some paintbrushes that I also cut out of the rainbow background that I made and I added some glittery hearts to the bottom.  I splattered the whole front with some white paint to give it an artsy fun appearance.  The Crystal Katana tool was very helpful in helping me replace the words in their holes and also to place the tiny hearts down at the bottom.


For my second card I used the word "Hello" from the Hello My Crafty Friend Die and cut it out 5 different times in a rainbow of glittered paper.  I layered a white banner on to a kraft card base to really make the repeated "Hellos" stand out.  To finish the card I stamped a sentiment from the Everyday Brush Strokes stamp set onto some kraft card stock and heat embossed it with white powder.  I popped the sentiment up with foam tape and the card was done.  This was a super quick card to put together but I think it looks fabulous because of all the glittery goodness in a rainbow of colors.  This is just one example of how you can use any of the words on their own from the Hello My Crafty Friend Die

Thanks for joining me today, I hope you'll share some creativity with one of your crafty friends!  This versatile die makes it super easy to do!
Don't forget to play along each month with the Kat Scrappiness challenge for your chance to win a $25 gift card to the KS online store.  This month's challenge is Envelope Art!  The Giraffe Envelope Art stamp set and The Owl Envelope Art stamp make dressing up your envelopes so much fun!
If you enter code Lisa10 at checkout you can receive 10% off of your order!
Have a great day everyone!
I already am!
๐ŸŽจLisa ๐ŸŽจ

Friday, April 27, 2018

MFT Sketch and SSS Wednesday Challenges


I haven't stayed up late crafting in such a long time but tonight I decided I just didn't want to go to sleep so I stumbled upon the MFT Wednesday Sketch Challenge #382 and I decided to play along.  It just so happens that this week is an Anything Goes challenge over at Simon Says Stamp Wednesday's challenge and they are using MFT products.  It was a perfect match up and I got to use an older stamp set from MFT called Polynesian Paradise which I love.  The stamp set lends itself to bright tropical colors and beautiful flowers.  I started out by stamping and coloring that cute pineapple with some Zig markers and I thought it would look cute coming out of one of the cups from the Hot Cocoa Cups die set.  The mug was so plain so I dressed it up with the flower cluster from the stamp set.  I used the Stitched Mini Scallop Square for the polka dot background behind the cup to match the sketch.  Finally I cut a tag from the Tag Builder Blueprints 4 and trimmed the 
circular opening off of it and stamped the sentiment on it.  
The patterned paper is from the MFT Dots and Stripes Sorbet paper pack.
Ok it's 3:30 am so it's probably time for bed now.
Thanks for stopping by!
Have a great morning, I already am!
๐ŸŒบ๐ŸŒผ๐ŸŒธ
Lisa

Thursday, April 26, 2018

Papertrey Ink MIM and SSS Wednesday Challenge


One fun card, two fun challenges.  I made this card for this weeks Make it Monday challenge over at Papertrey Ink and the Simon Says Stamp Wednesday challenge is Anything Goes so I'm entering it into both.  Betsy Veldman made a card for MIM with spot color word die cuts.  I used the Wonderful Words Baby die cut over the Doodlie Do stamp set.  This was a fun technique but I feel like it's hard to make out the word baby.  I stamped a sentiment from the Baby Button Bits stamp set on a stitched fishtail banner from Kat Scrappiness that I cut from some Bitty Big aqua mist paper.  
Here is a close up of the die cut "baby" word that I copic colored in pink and aqua. 


That's all for today!  Thanks for stopping by!
I hope you get some crafty time in today!
Enjoy your day, I already am!
๐Ÿ‘ถ๐ŸผLisa ๐Ÿ‘ถ๐Ÿผ

Tuesday, April 24, 2018

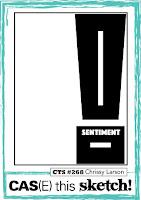
CAS(E) This Sketch #268

Quick post today to share my card for the CAS(E) this sketch challenge #268.  I love following these sketches because it speeds the creativity process along.  Simple card using basic crayola watercolors, a Kat Scrappiness wonky rectangle die and a beautiful Papertrey Ink sentiment, finished off with some Pretty Pink Posh clear sequins.
Have a great day everyone!
I already am!
๐ŸŒˆLisa ๐ŸŒˆ


Friday, April 20, 2018

Simon Says: Sparkle And Shine


I'm not sure if my craft table will ever recover from all this glitter......but I'm ok with it!  Love love love sparkle and shine!  SSS knows this about us paper crafters so this week's challenge was a TON of FUN!!  I finally got my SSS stitched butterflies in the mail so I promptly glittered them up to pop on my card.  The inspiration for this card actually came from a pretty notepad I bought at TJ Maxx recently.  I fell in love with the colors and the shine.  I was going to copy the pretty glittered heart on it but I opted for the beautiful butterflies instead.  Here is the notepad followed by my card.

I made the heart panel by stamping some hearts from the Essentials by Ellen stamp set Fancy Thanks in versamark ink.  I heat embossed them and inked the entire panel with Picked Raspberry and Spiced Marmalade distress inks.  
I matted the heart panel on some glitter paper and heat embossed the butterflies with glittered embossing powder after inking them with Picked Raspberry and Spiced Marmalade distress inks as well to match the panel.  The gorgeous doily is from the Greeting Farm which I die cut from glitter paper like the background.  I needed a happy birthday card so this sentiment from SSS Furry Cat and Box was the perfect size for the circle.  So much sparkly goodness on this card I can hardly stand it!
Here is a close up of those sparkly butterflies.

Of course pictures never do justice to sparkle and shine.
Thanks for stopping by and have a great Friday!
I already am!
๐Ÿ’–Lisa ๐Ÿ’–